
If you’re on the hunt for rich and clear bass from your speakers, a fascinating world awaits. It’s a world where the size of the enclosure and the achievable frequencies of the bass chassis play a crucial role. Manufacturers of premium bass chassis often provide vital information about their products, but sometimes these data can seem like hieroglyphics.
But fear not, there’s an elegant solution to decipher the mystery of bass chassis and determine the optimal size of the sealed enclosure – my Bass Formula online calculator. This handy tool is based on Frank’s Bass Formula, an expert in the field of speakers (you can find his informative video directly on my website).
Dive into the realm of bass and optimize your speakers for a sound experience that leaves nothing to be desired. Your personal bass calculator is at your disposal to unleash the full potential of your speakers.
The Bass Formula online calculator for sealed and bass reflex speaker enclosures
For closed speaker enclosures, a quality factor (Q-factor) of approximately 0.7 is typically recommended. Closed enclosures offer precise control over bass, and this quality factor helps in producing clean and well-defined bass.
On the other hand, for bass reflex enclosures, the recommended quality factor typically ranges from 0.55 to 0.6. Bass reflex enclosures are designed to provide greater efficiency and extended bass reproduction. A slightly lower quality factor in this range can contribute to making the bass deeper and more powerful.
Choosing the right Q-factor depends on your individual sound preferences and the design of your speakers. Closed enclosures offer precision, while bass reflex enclosures enable extended bass reproduction. It’s important to adjust the Q-factor accordingly to achieve the desired sound.
Video: Calculating sealed enclosure volume
Calculating bass reflex enclosure volume
The bass formula and what you need for it
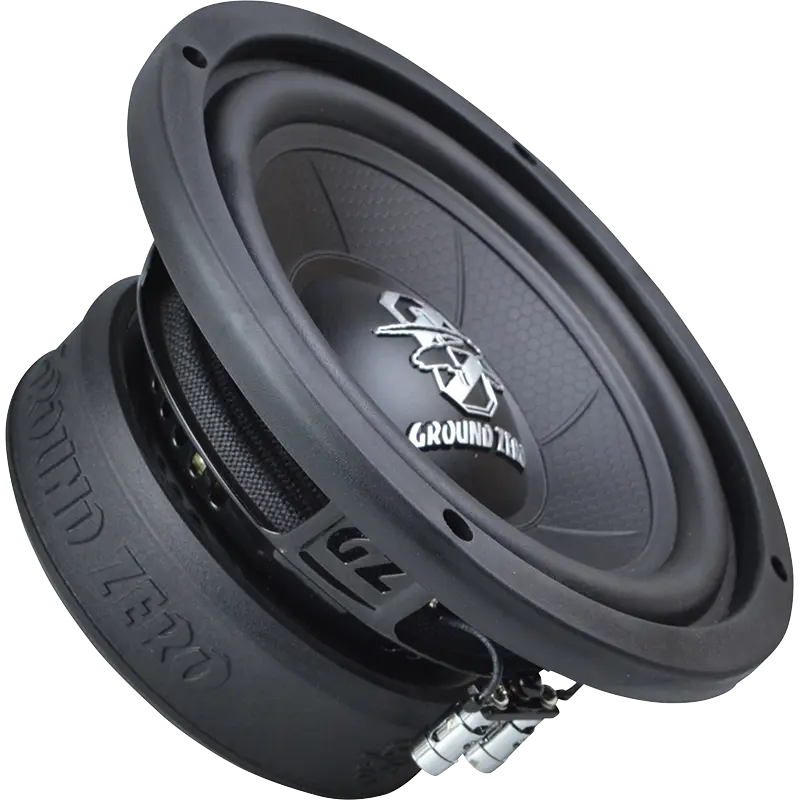
In my example, I’m using the bass driver from Ground Zero, the model GZIW 165. This bass has the following technical specifications:
Technical specifications: Ground Zero GZIW 165
| Model / Modell | GZIW 165 |
|---|---|
| Voice Coil Diameter / Schwingspule Ø | 38 mm / 1.5″ |
| Impedance / Impedanz | 4 Ohm / Ohms |
| Re | 3.6 Ohm / Ohms |
| Fs | 41 Hz |
| Qms | 10.70 |
| Qes | 0.43 |
| Qts | 0.41 |
| Vas | 9.1 L / 0.32 cu.ft. |
| Le | 1.59 mH |
| Mms | 40.4 gr |
| BL | 9.46 |
| Xmax | 10 mm / 0.39″ |
| Efficiency (SPL 1w/1m) / Wirkungsgrad | 85.5 dB |
| Power handling (RMS) / Belastbarkeit (RMS) | 100 Watt / Watts |
| Recommended Amplifier Power / Empfohlene Verstärkerleistung | 60 – 150 Watt / Watts |
| Outer Diameter / Außendurchmesser | 168 mm / 6.6″ |
| Mounting Cut Out / Einbaudurchmesser | 147 mm / 5.79″ |
| Mounting Depth / Einbautiefe | 79 mm / 3.11″ |
The bass formula is: Bass factor = Square root of (Vas/Vb + 1)
- Vas: You should understand Vas as an artificially defined metric that describes the ability of the speaker’s diaphragm (surround and spider) to return to its original position after being displaced. Vas represents the imaginary volume of air that compresses behind the diaphragm and pushes it back with the same force as the speaker’s suspension.
- Vb: In your specific case, since you’re planning a 10-liter enclosure for a bookshelf speaker with deep bass, you need to carefully calculate the enclosure volume. This is done using the dimensions width, depth, and height, i.e., W/D/H. Assuming you have internal dimensions of approximately 180 x 190 x 290 (without considering material thickness), this results in a speaker volume of about 9.92 liters.
Result: The conclusion of these calculations is based on the square root of (9.1/10 + 1), resulting in 1.382. This value is crucial for optimizing your 10-liter speaker enclosure for impressive, deep bass. You can find the Vas value in your speaker’s datasheet.
The Qtc formula is: Bass factor x Qts
- Qts: You should consider Qts as a measure of the overall quality of the speaker driver. It is derived from the values of Qms and Qes using the formula Qts = (Qms * Qes)/(Qms + Qes).
- Qms, on the other hand, measures the mechanical quality of the driver and is closely related to losses in the mechanical suspension (surround and spider) of the speaker.


Partnerlink*
The Hz (fc) formula is: Bass factor x Fs
- Fs: The Fs parameter is of interest when it comes to the lower end of your speaker’s frequency response. It marks the point at which the speaker’s frequency response begins to drop off. This parameter is particularly relevant for woofers and subwoofers as they are expected to reproduce frequencies near (and below) their resonance frequency.
Now you can calculate how low your bass driver can reach in terms of Hertz. You can find the Fs value in your speaker’s datasheet.
Result Fc: When you perform the calculation by multiplying 1.382 by the Fs value (found in the datasheet), you get the tuning frequency of your enclosure, which is at 56.66 Hz. This value is crucial for tuning your speaker to the desired bass range.
Guide: Building a Subwoofer - Technical Know-how

If you’re planning to build your own subwoofer to integrate powerful bass into your audio setup, it’s an exciting DIY project. Here you’ll find the technical knowledge and steps you need to create a high-quality subwoofer.
Step 1: Planning and Design
Before you begin construction, you need to develop a clear concept for your subwoofer. Here are some key considerations:
- Target Size: Determine the desired size of the subwoofer. This influences the bass produced and the enclosure size.
- Frequency Range: Define the frequency range the subwoofer should cover. This depends on your audio requirements.
- Driver Selection: Choose a high-quality subwoofer driver (speaker) that aligns with your goals.
- Enclosure Type: Decide whether you want to use a sealed, bass reflex, or bandpass enclosure.
Step 2: Subwoofer Driver Selection
Choosing the right driver is crucial. Pay attention to characteristics such as:
- Power: Ensure the driver can handle the required power.
- Resonance Frequency (Fs): It influences the bass tuning.
- Qts Value: This affects the overall quality of the driver and enclosure tuning.
- Efficiency (SPL): It determines the subwoofer’s volume.
Step 3: Enclosure Calculation
Depending on the enclosure type you choose (sealed, bass reflex, bandpass), you’ll need to calculate the dimensions and internal volume capacity. Also, consider the driver’s Fs value to achieve optimal enclosure tuning.
Step 4: Materials and Tools
Gather the necessary materials, such as MDF boards, screws, sealing material, etc.
Frequently Asked Questions (FAQ) about Subwoofer Construction
Is building your own subwoofer difficult?
Building your own subwoofer can pose a technical challenge, especially if you lack experience in handling electronics, circuits, and speakers. However, the difficulty level depends on various factors:
- Technical Knowledge: If you already have experience in the DIY realm or speaker building and possess basic knowledge of electronics and acoustics, building a subwoofer may be less difficult for you.
- Design and Planning: A significant part of success in subwoofer construction relies on careful planning and good design. This requires understanding speaker parameters, enclosure types, and tuning.
- Tools and Resources: You’ll need access to tools such as circular saws, drills, screwdrivers, and possibly soldering irons. Having the necessary resources is crucial.
- Time Commitment: Building a subwoofer can be time-consuming, especially if you’re developing and customizing it from scratch.
- Error Correction: Making mistakes during construction can affect the subwoofer’s performance. You may need to make adjustments and troubleshoot errors.
If you’re new to speaker building or feeling uncertain, it’s advisable to conduct comprehensive research beforehand and perhaps start with simpler projects before tackling a subwoofer. Seeking support from experienced hobbyists or professionals may also be helpful to ensure your project goes smoothly. With sufficient preparation and commitment, however, building your own subwoofer is certainly achievable.
What components do I need to build a subwoofer?
For building a subwoofer, you’ll need several essential components and materials. Here is a list of the basic parts you’ll need:
- Subwoofer Driver: The subwoofer driver is the speaker itself responsible for producing the bass sound. Choose a driver that fits your sound requirements and desired enclosure type.
- Enclosure: The enclosure is the frame containing the subwoofer driver and enhancing the sound. There are different enclosure types, including sealed, bass reflex, and bandpass enclosures. The choice depends on your sound goals and spatial constraints.
- Amplifier: An amplifier is necessary to power the subwoofer driver with sufficient power. Ensure that the amplifier’s power matches the driver’s specifications.
- Audio Cable: You’ll need cables to connect the amplifier to the subwoofer. Use high-quality cables to minimize signal losses.
- Sealing Material: To seal the enclosure and connections and reduce vibrations, you’ll need sealing materials such as foam or sealing tapes.
- Screws and Fastening Material: To assemble the enclosure, you’ll need screws and fastening material.
- MDF or Wood Panels: The enclosure walls are made from materials such as MDF (Medium-Density Fiberboard) or wood. These materials are sturdy and acoustically suitable.
- Speaker Terminal or Connection Plate: A speaker terminal or connection plate facilitates cable and connection attachment.
- Damping Material (optional): You can use damping material like Polyfill to optimize the sound inside the enclosure.
- Tools: You’ll need tools such as a circular saw, drill, screwdriver, sander, and soldering iron (if necessary).
- Construction Guide: It’s advisable to have a construction guide or at least technical data for the subwoofer driver to accurately set dimensions and tuning.
Ensure you select the right components and materials according to your design and sound goals. The quality of components and care in assembly are crucial for the performance of your homemade subwoofer.
How do I choose the right subwoofer driver?
Selecting the right subwoofer driver is crucial for the performance and sound quality of your subwoofer. Here are some key steps to choose the appropriate driver:
1. Define Your Requirements:
- Consider the purpose of the subwoofer. Is it for home theater, HiFi music playback, car audio, or professional sound reinforcement?
- Determine the desired frequency range and sound pressure level (SPL) the subwoofer should achieve.
2. Set Budget:
- Establish a budget for the subwoofer driver. High-quality drivers can be expensive, but there are also budget-friendly options available.
3. Check Technical Specifications:
- Review the technical specifications of the subwoofer driver, usually available in datasheets or online. Pay attention to parameters such as:
- Power (RMS and Peak): Ensure the driver’s power handling matches your amplifier.
- Resonance Frequency (Fs): This frequency influences bass tuning and the subwoofer’s lower frequency range.
- Total Q (Qts): This value affects the overall quality of the driver and enclosure tuning.
- Sensitivity (SPL): Indicates how loud the subwoofer can be at a given power.
- Diaphragm Diameter: A larger diaphragm diameter can move more air and produce more bass.
4. Consider Enclosure Type:
- Think about the enclosure type you intend to use (sealed, ported, bandpass). The driver must match the chosen enclosure.
5. Compare Brands and Models:
- Compare different brands and models of subwoofer drivers. Read reviews and ratings from other users to learn more about performance and reliability.
6. Sound Testing (if possible):
- If possible, listen to subwoofer drivers in action to determine if they meet your sound preferences.
7. Seek Advice:
- If you’re unsure or need additional support, ask for recommendations from specialty stores or audio experts.
Choosing the right subwoofer driver requires careful consideration and research. By understanding the technical specifications and clearly defining your requirements, you can select a driver that fits optimally with your subwoofer project.
Which case should I choose?
Choosing the right enclosure for your subwoofer significantly influences its performance and sound. There are various enclosure types to choose from, and the decision depends on your sound goals and spatial constraints. Here are the most common enclosure types and their pros and cons:
- Sealed Enclosure (Sealed Box):
- Pros:
- Precise bass with good control.
- Compact design and simple construction.
- Less sensitive to room acoustics.
- Cons:
- Lower maximum sound pressure level (SPL).
- Requires more power for deep bass.
- Pros:
- Bassreflex Enclosure (Ported Box):
- Pros:
- Deeper bass and higher maximum sound pressure level (SPL).
- Efficient use of amplifier power.
- Cons:
- Larger enclosure.
- Possible port noise if not well-designed.
- Pros:
- Bandpass Enclosure:
- Pros:
- Very deep bass and high maximum SPL.
- Limited influence of room acoustics.
- Cons:
- More complex construction.
- Difficult to optimize and requires precise calculations.
- Pros:
- Horn Enclosure:
- Pros:
- Highly efficient and high SPL.
- Good sound quality at low power.
- Cons:
- Larger enclosure with complex construction.
- Less control over bass at low volumes.
- Pros:
The choice of enclosure type should depend on your personal preferences and sound requirements. A sealed enclosure is a good choice if you desire precise and controlled bass, while a bassreflex enclosure can provide more volume and deep bass. Bandpass and horn enclosures are more powerful but require more effort in construction and tuning.
Also, consider the available space and room acoustics in your listening area. Sometimes, a more compact enclosure is the practical choice, while in other cases, a larger enclosure is necessary to achieve the desired bass performance. Take into account the subwoofer’s technical specifications and use software if needed to calculate the optimal enclosure dimensions for your requirements.
How do I tune my subwoofer correctly?
- Position the subwoofer in an appropriate location within the room to minimize disruptive room modes and enhance bass distribution. Experiment with different placements to find the best sound.
- Use high-quality audio cables to connect the subwoofer to the amplifier or AV control unit. Ensure that the wiring is correct and secure.
- Access the menu or settings of your amplifier or AV receiver, where you’ll typically find options for configuring the subwoofer.
- Adjust the subwoofer volume level to blend well with the main speakers. Start with a moderate volume level and increase or decrease it as needed.
- Set the crossover frequency, which indicates the frequency at which the subwoofer takes over bass duties. This depends on your main speakers and room acoustics. A typical setting ranges between 80 Hz and 120 Hz.
- The phase setting determines whether the subwoofer operates in phase (0°) or out of phase (180°) with the main speakers. Experiment with both settings and choose the one that provides the best sound.
- Modern AV receivers and subwoofers may offer room correction features. These analyze room acoustics and automatically adjust settings. Utilize this function to further optimize bass.
- Listen to music or movies and pay attention to the bass. Check if the subwoofer sounds clean and powerful without being overpowering or boomy.
- If necessary, perform further fine-tuning by adjusting volume levels, crossover frequency, and phase setting. Make small changes and retest the sound.
- Bass response can be sensitive to room acoustics and placement. You may need to revisit and readjust settings later, especially if furniture or room layout changes.
Do I need special tools?
Yes, when building a subwoofer, you will need specific tools to successfully carry out the construction and assembly. Here is a list of basic tools required for the subwoofer project:
Circular Saw: A circular saw is used to make precise cuts in wood or MDF panels for the enclosure. It is an essential tool.
Drill: You’ll need a drill to bore holes for screws, speaker terminals, and other fasteners.
Screwdrivers: Various screwdrivers are necessary to assemble screws and fasteners.
Grinder: A grinder or sandpaper is used to smooth edges and prepare surfaces.
Soldering Iron (if required): If you need to solder electrical components, you’ll require a soldering iron and solder.
Measuring Tape and Ruler: These tools help you take accurate measurements and position cuts correctly.
Tape Measure or Protractor: A tape measure or protractor assists in measuring and verifying angles and distances accurately.
Gloves and Safety Glasses: Wear gloves and safety glasses to protect yourself from wood chips and debris.
Clamps: Clamps are helpful for securely holding parts during gluing or screwing.
Jigsaw (optional): A jigsaw can be useful for more complex enclosure shapes or curved cuts.
Pencil and Markers: Use a pencil and markers to indicate cutting lines and assembly positions.
Screws, Nails, and Dowels: You’ll need various types of fasteners to assemble the enclosure.
Sealing Material: To seal the enclosure and minimize vibrations, you’ll need sealing materials like foam or sealing tape.
Crimping Tool (if required): If you’re crimping electrical cables, a crimping tool is necessary.
Cordless Drill (optional): A cordless drill can make work easier, especially when screwing many parts together.
Make sure you have the necessary tools before starting the subwoofer construction. The right equipment is crucial for performing precise cuts and assemblies, ensuring a successful project.
How can I make sure my subwoofer sounds good?
To ensure that your self-built subwoofer sounds great, careful planning, precise construction, and thorough tuning are crucial. Here are some steps and tips to optimize the sound quality of your subwoofer:
Careful Planning: Start with careful planning, including selecting the right subwoofer driver, enclosure type, and dimensions. Consider your sound goals and the room where the subwoofer will be used.
High-Quality Components: Use high-quality subwoofer drivers, amplifiers, and building materials. Lower quality components can compromise sound quality.
Precise Construction: Ensure that the enclosure is built precisely and sturdily. Inaccuracies can lead to sound distortions.
Sealing and Damping: Use sealing materials to seal the enclosure and ports and minimize vibrations. Damping materials like Polyfill can enhance sound quality.
Proper Tuning: Ensure proper tuning of the subwoofer. This includes setting the crossover frequency, phase angle, and level. Experiment with these settings to find the best sound.
Consider Room Acoustics: Room acoustics can have a significant impact on sound. Carefully position the subwoofer in the room and consider acoustic treatments to minimize unwanted reflections.
Conduct Listening Tests: Listen to various music genres and movies to evaluate your subwoofer’s sound. Pay attention to bass clarity, precision, and the transition to the main speakers.
Measurements and Room Correction: Use audio measurement tools like a measurement microphone and room correction software to objectively analyze and adjust the sound. Modern AV receivers often offer room correction features.
Patience and Fine-Tuning: Fine-tuning requires patience. Small changes in settings can make significant differences in sound. Take time for fine-tuning and listening tests.
Seek Advice and Feedback: If possible, seek advice and feedback from experienced audiophiles or audio experts. External opinions can be helpful.
Document Measurement Results: Document your settings and measurement results. This allows you to make adjustments if needed or identify issues.
By following these steps and continuously working on fine-tuning your subwoofer, you can ensure that it sounds great and provides high-quality bass reproduction. Keep in mind that sound quality also depends on room acoustics, so additional acoustic measures may be necessary to achieve optimal results.
Are there any legal aspects to consider?
Yes, when building a subwoofer, there are several legal aspects to consider, especially if you intend to operate it in a public environment or comply with certain safety and noise regulations. Here are some important legal aspects:
Noise Regulations:
Most countries have noise regulations that govern the maximum volume of audio systems in residential areas and public places. Ensure that your subwoofer complies with local noise regulations to avoid potential fines or noise complaints.
Electrical Safety:
If you are building the subwoofer yourself or installing electrical components, ensure that the electrical installation complies with local electrical safety regulations. This may include connecting to a grounded outlet and using certified electrical components.
Product Liability:
If you sell or make your self-built subwoofer available to others in any way, you could be subject to legal requirements for product liability. Ensure that the subwoofer is safe and free from defects to avoid liability claims.
Copyright Issues:
Note that some commercial audio content, especially music and movies, are copyrighted. Playing such content in public may raise copyright issues. Familiarize yourself with applicable copyright laws and the licensing of music and videos.
Permits for Public Events:
If you intend to use the subwoofer at public events or in commercial establishments, special permits or licenses may be required. This depends on local regulations and laws.
It is advisable to familiarize yourself with local laws and regulations before building and operating a subwoofer and, if necessary, seek legal advice. Compliance with legal requirements and safety regulations is important to avoid legal issues and potential risks.
Where can I find instructions and resources for building a subwoofer?
There are many resources and building guides available on the internet that can help you build your own subwoofer. Here are some places where you can find useful information:
Forums and Online Communities: There are online forums and communities where audio enthusiasts and DIY enthusiasts share their experiences and projects. Websites like diyaudio.com and avsforum.com are good places to look for building guides and tips.
YouTube: YouTube hosts numerous video tutorials and building guides for subwoofer construction. Many content creators share their projects and step-by-step instructions.
DIY Audio Websites: Some websites focus specifically on DIY audio projects and provide extensive building guides and plans for subwoofers and speakers. One example is speakerbuilder.net.
Books and eBooks: There are books and eBooks dedicated to speaker construction that provide detailed instructions for various types of subwoofers. Libraries and online bookstores are good sources for such resources.
Speaker Building Kits: Some companies offer subwoofer building kits that include all the necessary components and a detailed construction manual. These kits are often ideal for beginners as they provide everything needed in one package.
Speaker and Electronics Forums: In addition to DIY audio forums, there are also forums specializing in electronics and circuits. These forums can provide information on amplifier circuits, filters, and other electronic aspects of subwoofer construction.
Trade Magazines: There are trade magazines in the audio and electronics industry that publish construction guides for speakers and subwoofers. Subscribing to a magazine or purchasing individual issues can be a source of information.
Make sure that the building guide or resource you choose matches your skills and goals. Perhaps start with simpler projects if you are new to speaker construction, and then progress to more complex subwoofers as you gain more experience. And don’t forget to consider the quality of the components, as this has a significant impact on the sound quality.
Is building a subwoofer more cost-effective than buying a finished subwoofer?
Building a subwoofer can be more cost-effective than purchasing a high-quality pre-made subwoofer, but this depends on various factors, including your skills, budget, and requirements. Here are some considerations:
Advantages of Building a Subwoofer:
- Customized Sound: Building your own subwoofer allows you to customize the components and enclosure according to your sound preferences, resulting in a tailored sound experience.
- Learning Opportunity: Building a subwoofer can be an educational experience and provide you with knowledge in the areas of speakers and electronics.
- Cost Savings: With careful selection of components and materials, you can often build a subwoofer with comparable performance at a lower cost than an equivalent commercial model.
Disadvantages of Building a Subwoofer:
- Labor Intensive: Building a subwoofer requires time and craftsmanship. If you lack these resources or are not willing to invest, purchasing a pre-made subwoofer might be more convenient.
- Lack of Warranty: Self-built subwoofers usually do not come with manufacturer warranties like commercial products. If issues arise, you are responsible for repairs or replacement.
- Quality Control: The quality of your self-built subwoofer depends on your skills and component selection. Without experience in speaker construction, you could inadvertently compromise sound quality.
- Tool and Material Costs: Subwoofer construction requires the purchase of tools and materials, which may incur additional costs initially.
- Time Investment: The construction process can take some time, especially if you are a beginner or tackling a complex project.
Overall, subwoofer construction can be a cost-effective option if you are willing to invest time and effort to create a customized audio experience. However, it’s important to carefully consider the total costs and effort involved and ensure that you have the necessary skills and resources to successfully complete the project. If you are uncertain, purchasing a pre-made subwoofer might be the easier option.
What software is there?
When building a subwoofer, various types of software are available to assist with planning, calculation, and fine-tuning. Here are some important software categories and examples:
1. Enclosure Design Software:
- WinISD: WinISD is widely used free software for calculating speaker enclosures. It allows you to select the right enclosure type and calculate the required enclosure dimensions.
2. Crossover Simulation Software:
- XSim: XSim is an open-source software for simulating crossovers. It helps in planning and simulating speaker crossovers for multiple drivers.
3. Measurement Software and Hardware:
- REW (Room EQ Wizard): REW is a popular free software for room acoustics measurement and analysis. It can assist in fine-tuning the subwoofer and room acoustics.
- Umik-1: This is an example of a USB measurement microphone commonly used with software like REW to conduct acoustic measurements.
4. Simulation and Modeling Software:
- Hornresp: Hornresp is software for modeling horn loudspeakers. It’s helpful if you want to design horn subwoofers.
- BassBox Pro: BassBox Pro is commercial software for modeling and simulating speaker enclosures and crossovers.
5. Room Acoustic Simulation Software:
- EASE (Enhanced Acoustic Simulator for Engineers): EASE is professional software for simulating room acoustics. It’s often used by professional sound designers and acoustical engineers.
6. CAD Software:
- CAD software like AutoCAD or SketchUp can be useful for drawing enclosure plans and planning the construction of your subwoofer.
7. Electronics Design Software:
- If you’re designing electronic circuits or amplifiers for your subwoofer, software tools like LTspice or KiCad could be helpful.
The selection of the right software depends on your specific requirements and skills. Beginners may benefit from simple enclosure design tools like WinISD, while advanced users may use more comprehensive software for crossovers, measurements, and simulations. Keep in mind that using some of these tools may require a learning curve, but they can help you create a subwoofer with optimal performance and sound quality.