In this article, the focus will be on explaining how a solar system is set up in a motorhome and what is needed for each component. This can help you understand what you need and why!
Solar System Batteries


Let’s start with the basics, namely the batteries for your motorhome and solar system! It’s truly fascinating to see the differences between AGM and lithium batteries. An AGM battery weighs approximately a hefty 30 kilograms, while a lithium battery weighs only a light 17 kilograms. That’s already an interesting difference!
But what’s truly impressive is this: an AGM battery can only utilize up to 50% of its capacity, while a lithium battery offers an astonishing 99% performance. That’s enormous potential! And the differences don’t stop there.
The lithium battery outperforms the AGM battery in terms of power by multiples. Imagine, instead of two 100Ah AGM batteries, you only need a single lithium battery with the same capacity. That means less weight, from 60 kilograms down to just 17 kilograms. In a motorhome, weight is definitely an interesting factor to consider!
But which lithium battery should it be? For me, the options are:
- WATTSTUNDE® Lithium 12V 200Ah LiFePO4 Battery LIX12-200-BS (approximately 700 euros)
- LIONTRON LiFePO4 12.8V 200Ah LX Smart BMS with Bluetooth (approximately 1900 euros)
The main difference between the LIONTRON LiFePO4 12.8V 200Ah LX Smart BMS with Bluetooth and the WATTSTUNDE® Lithium 12V 200Ah LiFePO4 Battery LIX12-200-BS is the integrated Battery Management System (BMS). The BMS is responsible for monitoring and controlling the battery, protecting it from overcharging, deep discharge, overcurrent, and overheating.
The LIONTRON battery features an LX Smart BMS with Bluetooth interface, allowing you to monitor and control the battery via a smartphone app. The WATTSTUNDE® battery features a standard BMS without a Bluetooth interface.
Another difference between the two batteries is the heating capability. The WATTSTUNDE® battery has an integrated heating mat with 8A power, useful for operating the battery in cold environments. The LIONTRON battery does not have an integrated heating mat but can be operated with an external heating mat.
Otherwise, the two batteries are very similar. They both have a high cycle count of over 3500 at 90% depth of discharge and a continuous discharge current of 200A.
Which battery is better suited for you depends on your individual needs. If you need a battery with a Bluetooth interface or if you plan to operate the battery in cold environments, the WATTSTUNDE® battery is a good choice. However, if you prefer a battery without an integrated heating mat or Bluetooth interface, the LIONTRON battery is a good option.
Here’s a table comparing the two batteries:
| Feature | LIONTRON LiFePO4 12.8V 200Ah LX Smart BMS with Bluetooth | WATTSTUNDE® Lithium 12V 200Ah LiFePO4 Battery LIX12-200-BS |
|---|---|---|
| Nominal Voltage | 12.8V | 12V |
| Nominal Capacity | 200Ah | 200Ah |
| Cycle Count | over 3500 at 90% depth of discharge | over 3500 at 90% depth of discharge |
| Continuous Discharge Current | 200A | 200A |
| BMS | LX Smart BMS with Bluetooth | Standard BMS |
I would choose to use two WATTSTUNDE® Lithium 12V 200Ah LiFePO4 batteries of type LIX12-200-BS. This would give me a total capacity of 400Ah.
Battery Main Switch
In our motorhome solar system, one function plays a particularly important role: the ability to interrupt the power supply to the batteries as needed and to completely shut down the motorhome’s power. This is especially useful when we want to completely stop the energy supply.
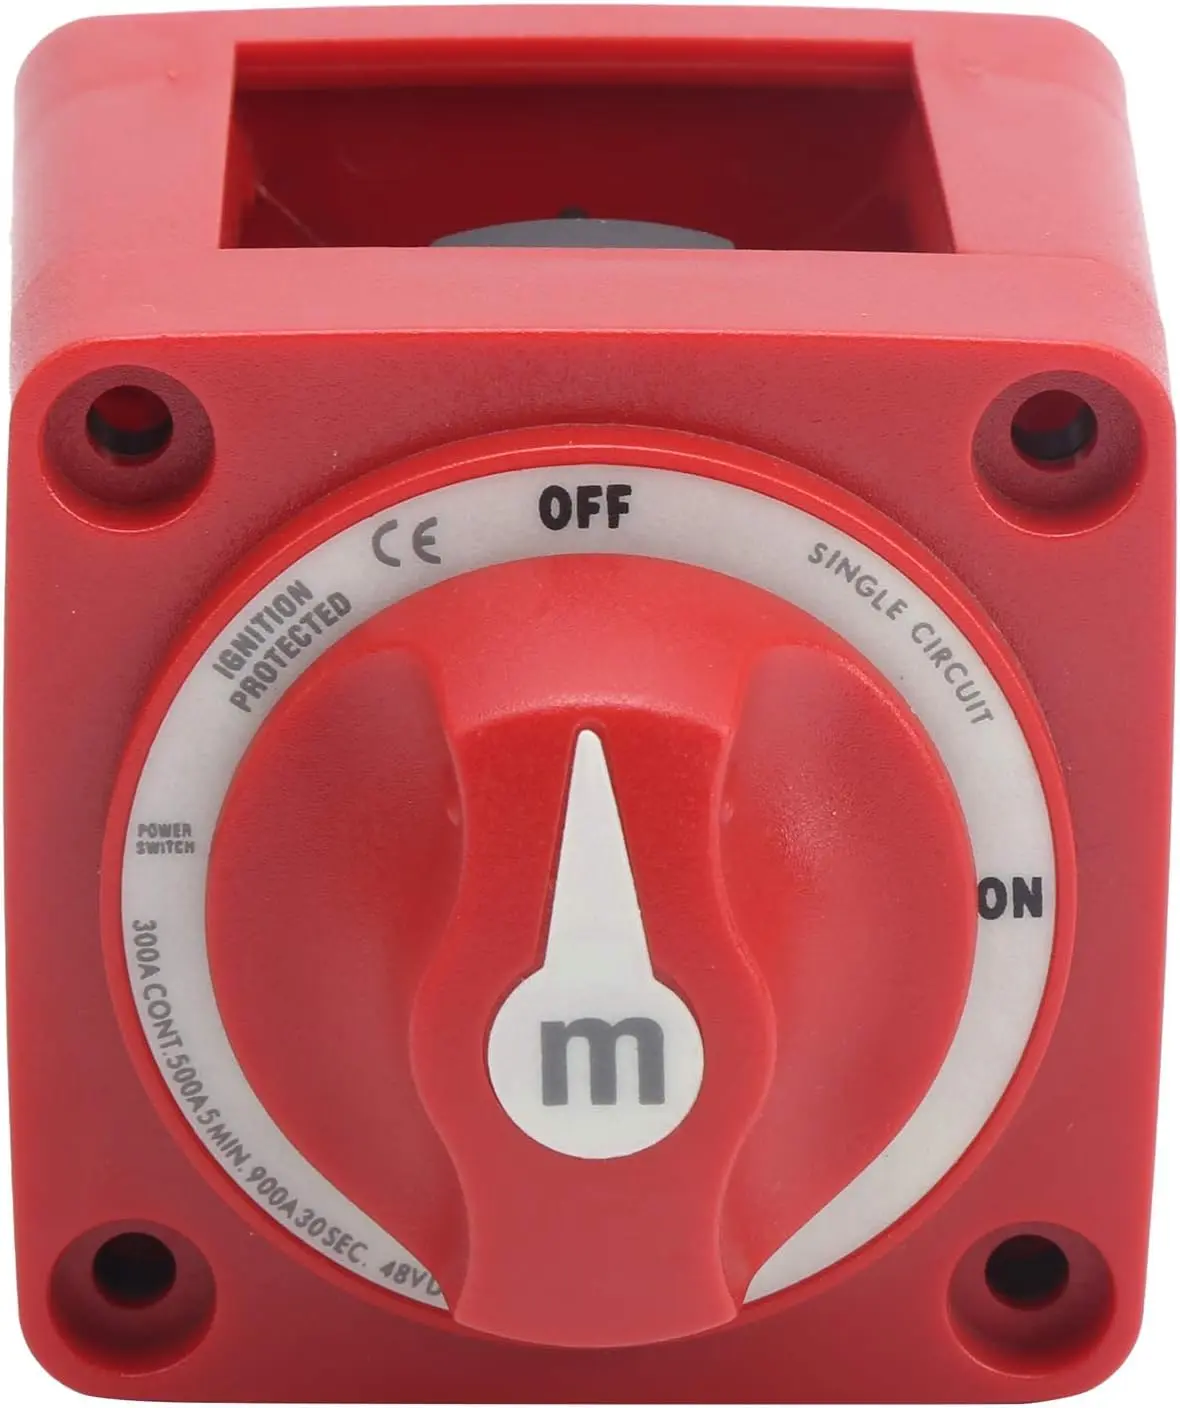
To implement this function, we install a main switch (High Current Shut-Off Switch High Performance Battery Isolator Main Switch for Small Boats Yacht On/Off Accessories M5 DC 48V 300A) with an impressive continuous power rating of 300 amps. This main switch is strategically positioned between the batteries and the Victron Lynx Distributor. It serves as a veritable control center for electrical management.
Imagine being able to cut off power to all electrical systems in the motorhome with a single flick of a switch. Whether it’s minimizing energy consumption for the night or ensuring safety during maintenance work, this main switch makes it possible.
It not only offers impressive performance but also the assurance that our power supply system works exactly when we need it – and when we don’t, we can completely shut it down with a single switch press. It’s the ultimate control over our mobile power supply.
This one is priced at 30 euros.
Victron Lynx Distributor
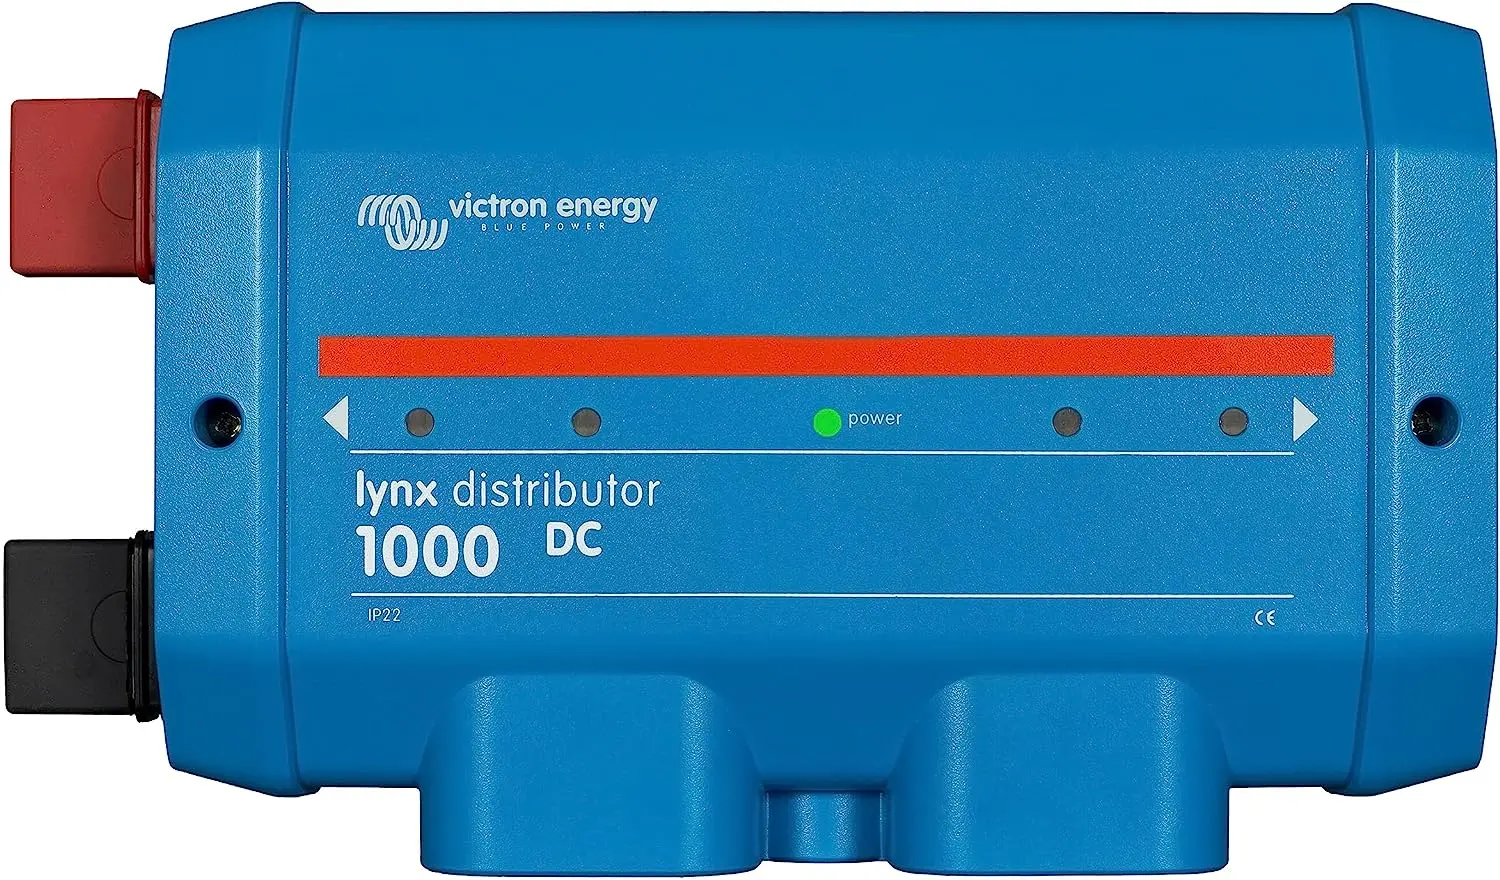
The Victron Lynx Distributor 1000 DC is a crucial component of an electrical distribution system in solar and energy storage installations. It plays a vital role in efficient power distribution and monitoring. Here’s an explanation of what the Victron Lynx Distributor 1000 DC is used for and why it’s important:
Purpose:
The Victron Lynx Distributor 1000 DC is a direct current (DC) distributor primarily used in solar and energy storage systems. Its main function is to collect the generated DC power from solar panels or other DC power sources and efficiently distribute it to various consumers or batteries.
Key Features and Characteristics:
- Power Distribution: The distributor enables the allocation of DC power to various consumers or batteries. This is particularly important to ensure that the generated power is utilized efficiently and to prevent overloads.
- Monitoring and Safety: The Lynx Distributor 1000 DC is often equipped with protection and monitoring features. This may include residual current protection, overcurrent protection, and voltage monitoring. These features ensure the safety of the system and connected devices.
- Modularity: A significant advantage of the Lynx Distributor is its modularity. It can be expanded with various modules and switchboards to meet the specific requirements of the system. This allows for flexible configuration and scalability.
- Battery Charging Optimization: In energy storage systems, the distributor plays a key role in controlling and distributing the power used to charge batteries. This contributes to extending battery life and optimizing energy efficiency.
- Integration with Inverters: The distributor can seamlessly integrate with inverters and other components of the system to control energy flows and ensure that energy is used where it is needed.
Why It’s Important:
The Victron Lynx Distributor 1000 DC is important because it forms the foundation for safe, efficient, and reliable power distribution in solar and energy storage systems. With its features and flexibility, it helps maximize system performance, extend battery life, and ensure system reliability. Thus, the Lynx Distributor plays a crucial role in harnessing renewable energy and optimizing energy consumption.
It’s priced at around 220 euros!
Victron Energy BMV-712 Smart Battery Monitor

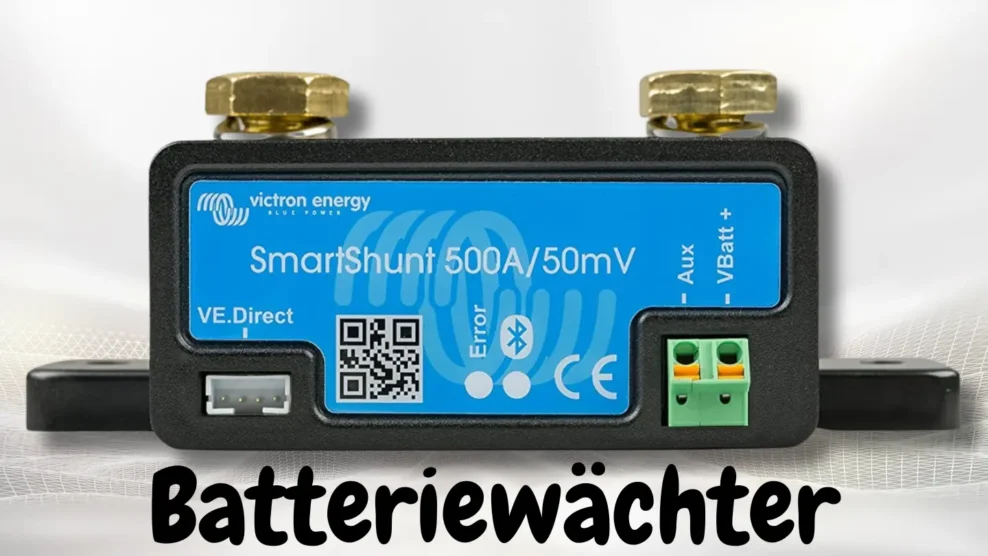
To monitor our battery using a smartphone or tablet, a battery monitor is essential. The Victron Energy BMV-712 Smart Battery Monitor proves to be an extremely useful and accurate device for this purpose. It meticulously monitors the state of your battery and provides precise information about the current voltage, current, state of charge (SoC), and remaining capacity. Additionally, it allows you to monitor the performance of your solar charger or wind generator.
What sets the BMV-712 Smart apart is its integrated Bluetooth module. This feature enables you to monitor and control the battery via the VictronConnect App on your smartphone or tablet. The app displays all essential battery information in real-time and allows you to set up individual alarms. This way, you’ll be notified when the battery reaches a certain state of charge or when an error occurs.
The BMV-712 Smart is a versatile device that can be used in a wide range of applications, whether in motorhomes, boats, solar installations, or off-grid systems.
Here are some standout features of the Victron Energy BMV-712 Smart Battery Monitor:
- Precise Measurements: It measures voltage, current, state of charge (SoC), and remaining capacity extremely accurately.
- Bluetooth Connection: With the integrated Bluetooth module, you can monitor and control the battery via the VictronConnect App on your mobile device.
- Alarm Functions: You can set up individual alarms to be notified of low or high state of charge, overcurrent, over/under voltage, or overtemperature.
- Versatile Application: The BMV-712 Smart can be used in various applications, including motorhomes, boats, solar installations, and off-grid systems.
Another advantage of the BMV-712 Smart is its compatibility with various battery types, including lead-acid batteries, lithium batteries, and nickel-cadmium batteries. Additionally, it is compatible with a range of Victron Energy products, including solar chargers, inverters, and battery chargers. The installation and use of the BMV-712 Smart are also extremely user-friendly. If you’re looking for a reliable and accurate battery monitor, the Victron Energy BMV-712 Smart is undoubtedly an excellent choice.
It’s priced at around 160 euros!
The interim status of the solar system
In our motorhome, we now rely on an impressive lithium battery with a total capacity of 400 Ah, excluding the starter battery, of course. Thanks to the Victron Lynx Distributor, we have the capability to harness this considerable amount of energy from batteries connected in parallel and achieve an extremely efficient energy management system. But that’s not all the Lynx Distributor has to offer. It also allows us to seamlessly integrate various additional components and devices into our already advanced power supply system.
To further enhance control over our energy supply system, we’ve installed a protective circuit breaker between the battery and the Lynx Distributor. With this switch, we can interrupt the flow of electricity at any time if necessary.
And the best part is yet to come: In the future, we have the opportunity to connect a whole range of additional devices and components. These include, for example, solar panels, inverters, chargers, and monitoring systems. This not only enables us to significantly increase our energy efficiency but also greatly enhance the comfort of living. Moreover, the Lynx Distributor features comprehensive protection functions, including fuses that safeguard all connected devices from overloads and short circuits. In this way, we ensure not only safety but also the ultimate reliability of our entire motorhome power supply system.
Furthermore, we can now monitor our battery using the Victron Energy BMV-712 Smart Battery Monitor via our smartphone. This allows us to check important battery data in real-time and set up custom alarms to notify us of any faults or specific charge states.
However, despite all these advancements in our power supply system, the question arises: What other components and accessories are needed to fully equip our solar installation in the motorhome?
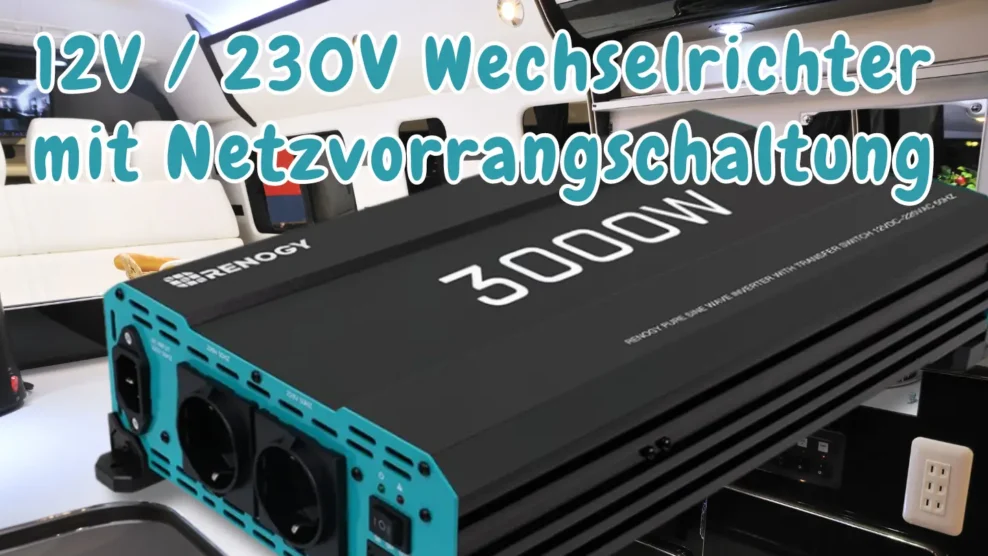
Victron MultiPlus-II 12/3000/120-32

The Victron MultiPlus-II 12/3000/120-32 is much more than just an inverter for 230 volts and a charger – it offers almost uninterrupted power supply and comprehensive energy management for your motorhome. This impressive device ensures that your energy supply is always in good hands and provides a wide range of features to charge and utilize batteries under various conditions and in different ways.
Here are the outstanding features of the Victron MultiPlus-II 12/3000/120-32 at a glance:
Versatile Inverter and Charger: This device not only acts as an inverter, enabling the conversion of direct current (battery power) into alternating current at 230 volts, but also serves as a powerful charger. This dual function ensures continuous power supply for your devices and enables efficient charging of your batteries.
Shore Power Utilization: The MultiPlus-II allows you to conveniently power your motorhome using shore power. Even in situations where shore power supply offers limited ampere strengths, such as various campsites in different countries, the MultiPlus-II automatically adjusts to the available power. This means that even with limited shore power, you still have the ability to charge your batteries.
Solar Charging: The MultiPlus-II can efficiently utilize the energy generated by the solar panels on the roof of your motorhome to charge the batteries. This allows you to benefit from renewable energy while camping and charge your batteries without relying on external power sources.
Charging While Driving: While driving, the MultiPlus-II ensures that your batteries are charged through the vehicle’s alternator. This way, you can optimize the energy generated during the drive and ensure that your batteries are always charged.
Intelligent Control: The MultiPlus-II features intelligent control that ensures efficient energy utilization and keeps the batteries in optimal condition. This not only ensures reliable power supply but also extends the life of your batteries.
Technical Specifications:
- Inverter: 2400 watts output power, 230 volts output voltage, 50/60 Hertz output frequency.
- Charger: 120-ampere charging current, 12-volt battery voltage.
- Additional Features: PowerControl, PowerAssist, GridAssist.
- Dimensions: 54.6 x 27.5 x 14.7 cm.
- Weight: 10.5 kg.
The Victron MultiPlus-II 12/3000/120-32 offers the perfect combination of power and versatility for reliable power supply in your motorhome or other applications, whether you’re using shore power, solar energy, or your vehicle’s alternator.
The price for this remarkable device, which provides almost uninterrupted power supply and intelligent energy management, is around 1100 euros.
Victron VE.Bus Smart Dongle
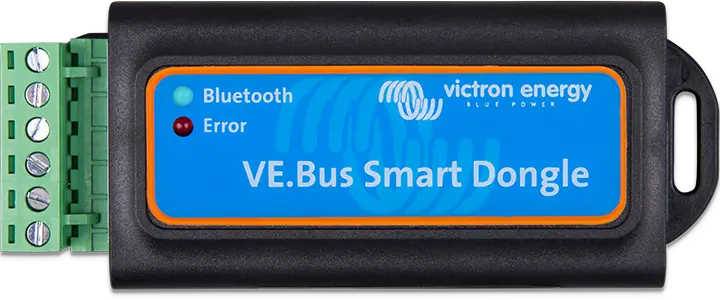
To program and monitor the Victron MultiPlus-II 12/3000/120-32, the Victron VE.Bus Smart Dongle is required to access it via the smartphone and the VictronConnect app. It’s regrettable that this dongle isn’t already integrated and must be purchased separately!
The Victron VE.Bus Smart Dongle is a Bluetooth adapter that connects to a Victron inverter/charger. It enables wireless monitoring and control of the inverter/charger via the VictronConnect app.
With the VE.Bus Smart Dongle, you can:
- View the status of the inverter/charger, including output power, input voltage, and battery voltage.
- Operate the inverter/charger, such as changing input current limit or switching between operating modes.
- Receive alarms and warnings, such as when the battery voltage is too low.
The VE.Bus Smart Dongle is compatible with a variety of Victron inverter/chargers, including:
- Multi
- MultiPlus
- MultiPlus-II
- MultiGrid
- MultiGrid-II
- Quattro
- Phoenix
The VE.Bus Smart Dongle is a simple and cost-effective way to monitor and control your Victron inverter/charger.
Here are some specific use cases for using the VE.Bus Smart Dongle:
- You can use the VE.Bus Smart Dongle to monitor the status of your inverter/charger while on the go. This way, you can see if your system is functioning properly and if there are any issues.
- You can use the VE.Bus Smart Dongle to operate the inverter/charger without having to go to the inverter/charger. For example, you can change the input current limit or switch between operating modes.
- You can use the VE.Bus Smart Dongle to receive alarms and warnings. For example, you’ll be notified if the battery voltage is too low.
Technical Specifications:
- Bluetooth Version: 4.0
- Range: Up to 10 meters
- Power Supply: Via the inverter/charger
- Dimensions: 63 x 22 x 15 mm
- Weight: 15 g
With the Victron VE.Bus Smart Dongle, you gain flexibility and control over your Victron inverter/charger directly from your smartphone.
Price-wise, it’s around 90 euros!
230 Volt fuse box
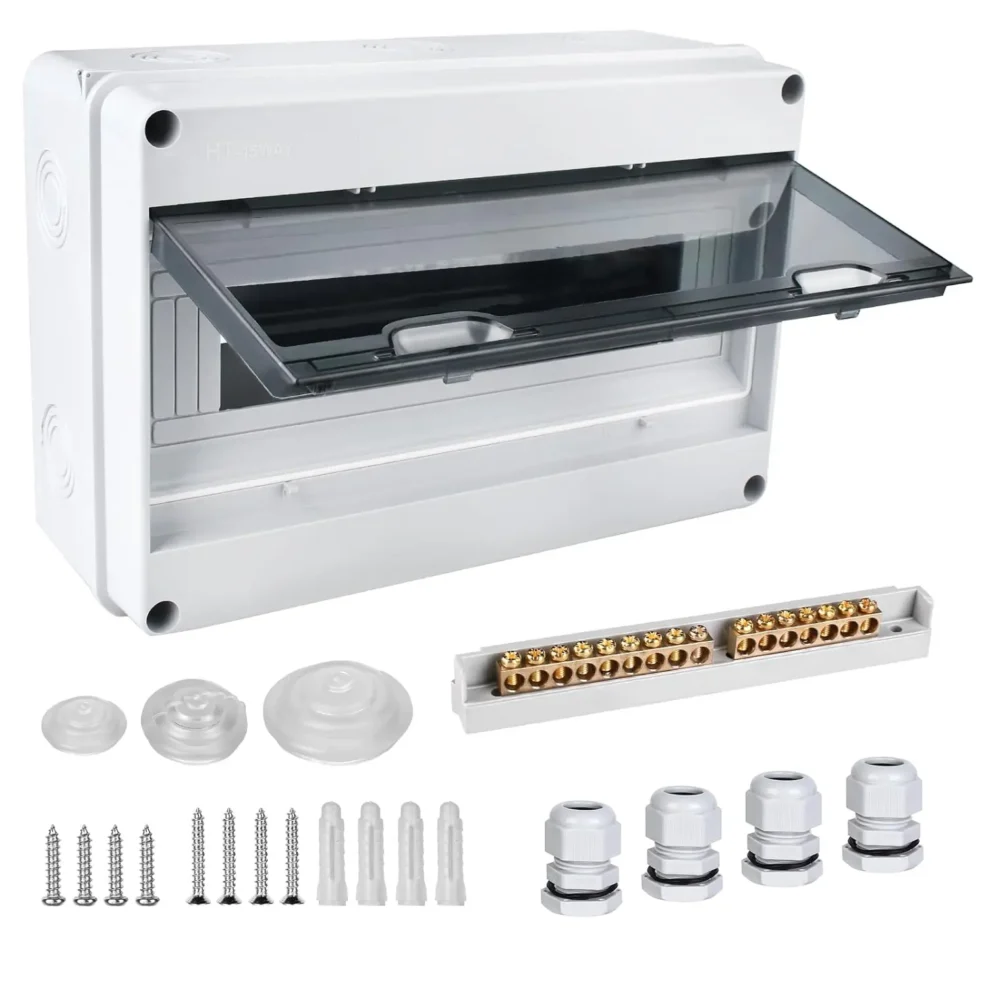
A motorhome requires a 230 Volt fuse box for several important reasons:
- Power Distribution: In a motorhome, various electrical devices and systems are operated, including lighting, refrigerator, air conditioning, heating, water pump, and more. A 230 Volt fuse box is used to distribute incoming power and ensure that the various devices and systems are adequately supplied with electricity.
- Safety: The fuse box contains fuses or circuit breakers that shut off the power flow in case of an overload or a short circuit, protecting the electronics and preventing fires or other hazards.
- Power Source: Some motorhomes have an external power supply, allowing the motorhome to be connected to the public electricity grid when parked at a campground. The fuse box regulates the power flow from this external source and ensures the safe distribution of electricity in the motorhome.
In conjunction with the Victron MultiPlus-II 12/3000/120-32, the 230 Volt fuse box becomes a crucial element for the safe and efficient use of electrical energy in a motorhome. The Victron MultiPlus-II is an inverter and charger that generates the alternating current (230 volts) needed in a motorhome.
Overall, the 230 Volt fuse box, in combination with the Victron MultiPlus-II, enables safe and reliable power supply in a motorhome, whether you’re at a campground or off-grid. It not only protects your electrical devices but also ensures the comfort and convenience of a reliable energy supply.
Additionally, you’ll need a residual-current device (RCD)* and individual fuses later!
Price-wise, this is around 25 euros!
CEE Caravan Inlet Plug (Shore Power)
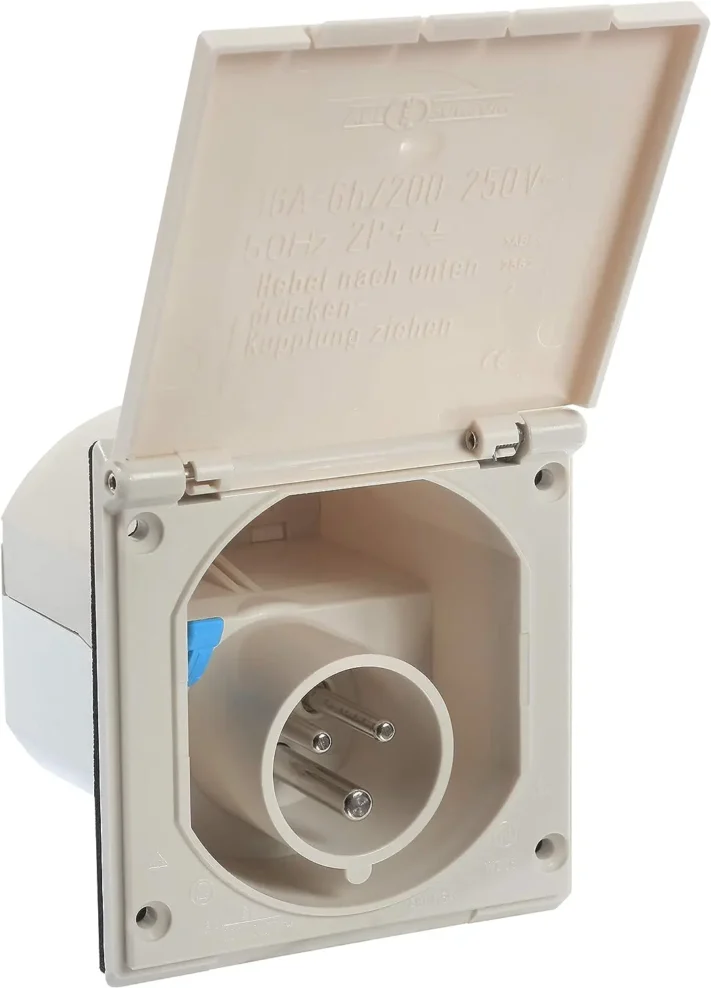
A CEE socket (Camping Electric Energy) is necessary in a motorhome for several important reasons:
- Safety: CEE sockets are specifically designed for outdoor and humid environments. The IP44 protection class means they are protected against the ingress of water and dust. This ensures the safety of electrical connections, especially in camping and outdoor areas.
- Compatibility: CEE sockets are designed to be compatible with common CEE couplings. This makes them a simple and reliable solution for connecting motorhomes and caravans to external power sources, whether at campsites or other locations.
- Robustness and Durability: These sockets are made of sturdy polyamide, making them durable and resistant to outdoor challenges. The hinged cover protects the socket from contamination and accidental removal.
- Maximum Power: CEE sockets are designed for high power and can handle up to 16 amperes and 3,500 watts. This allows for the operation of multiple electrical devices in the motorhome simultaneously without overloads.
- Versatility: They are multifunctional and compatible with various types of CEE plugs as well as adapters for Europlugs and Schuko plugs. This makes them extremely versatile and suitable for various applications.
Overall, the CEE socket in the motorhome provides a reliable and safe way to connect the vehicle to external power. It is essential for operating electrical devices in the motorhome, whether at a campsite or a location where an external power source is needed.
Price-wise, this is around 20 euros!
12 Volt Fuse Box
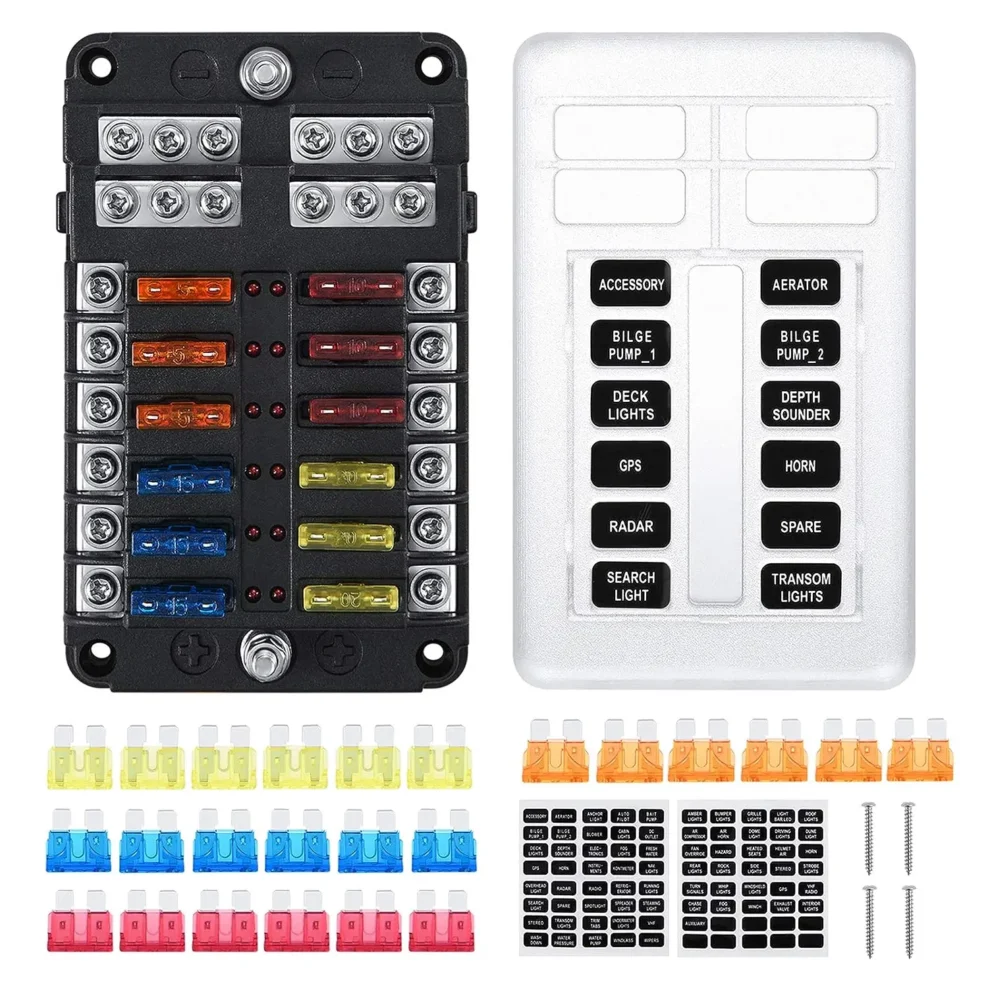
In a motorhome, various electrical devices and systems can run on 12 volts. Here are some examples of such devices and systems:
- Lighting: The interior and exterior lighting of a motorhome are often operated on 12 volts. This includes ceiling lights, reading lamps, signal lights, and more.
- Water Pumps: The water pump, which distributes fresh water in the motorhome, is usually operated on 12 volts.
- Refrigerator: Many motorhomes have 12-volt refrigerators that can be used while driving and stationary.
- Fans: Fans in the motorhome, whether for ventilation or cooling, are often operated on 12 volts.
- Ventilation Systems: Some motorhomes have ventilation systems and roof vents that run on 12 volts to ensure good air circulation inside.
- Heating Systems: Certain heating systems, especially those based on propane, can use 12 volts for the control and operation of fans and thermostats.
A fuse box for 12 volts is crucial to ensure electrical safety in the motorhome. Here are the reasons why such a fuse box is needed:
- Protection against Overload: A fuse box contains fuses or circuit breakers that interrupt the circuit when excessive current flow occurs. This protects the wiring and connected devices from damage due to overload or short circuits.
- Organization: A fuse box provides an organized method for distributing and separating the various circuits in the motorhome. This allows for targeted control and isolation of the power supply to individual devices or systems.
- Safety: Using a fuse box minimizes the risk of fires or other electrical hazards. In case of a problem, the fuse can interrupt the current flow before serious damage occurs.
- Diagnosis: A fuse box facilitates troubleshooting in case of a power outage or malfunction of a device. By checking the fuses, you can determine which circuit is causing the problem.
In summary, a fuse box for 12 volts in a motorhome is crucial to ensure electrical safety, protect the wiring, and organize and control the power supply for various devices and systems in the vehicle.
Price-wise, this is around 18 euros!
Status Update of the Solar System
In our motorhome, we recently upgraded to an impressive lithium battery with a total capacity of 400 Ah, excluding the starter battery, of course. However, thanks to the Victron Lynx Distributor, we have the ability to harness this significant amount of energy from parallel-connected batteries and achieve extremely efficient energy management. But that’s not all the Lynx Distributor has to offer. It also allows for seamless integration of various additional components and devices into our already advanced power supply system.
To further enhance control over our energy supply system, we have installed a protection circuit breaker between the battery and the Lynx Distributor. With this switch, we can interrupt the flow of electricity at any time if necessary.
But the best part is yet to come: In the future, we have the opportunity to connect a variety of additional devices and components. These include, for example, solar panels, inverters, chargers, and monitoring systems. This not only enables a significant increase in our energy efficiency but also a substantial improvement in living comfort. Furthermore, the Lynx Distributor features comprehensive protection functions, including fuses, which protect all connected devices from overloads and short circuits. This ensures not only safety but also the ultimate reliability of our entire motorhome power supply system.
Additionally, we can now monitor our battery with the Victron Energy BMV-712 Smart Battery Monitor via our smartphone. This allows us to check important battery data in real-time and set up custom alarms to notify us of any faults or specific charging states.
Furthermore, we have added the Victron MultiPlus-II 12/3000/120-32 inverter, which converts the battery power into 230 volts and is protected by a 230-volt fuse box. The Victron VE.Bus Smart Dongle allows us to monitor and adjust the Victron MultiPlus-II via an app. To connect external shore power, we have installed a CEE Caravan Inlet Plug. For the 12-volt protection in the motorhome, a fuse box has been installed, which will later protect lights, water pump, fans, and other 12-volt devices.
Despite all these advancements in our power supply system, the question now arises: What further components and accessories are needed to fully equip our solar system in the motorhome?
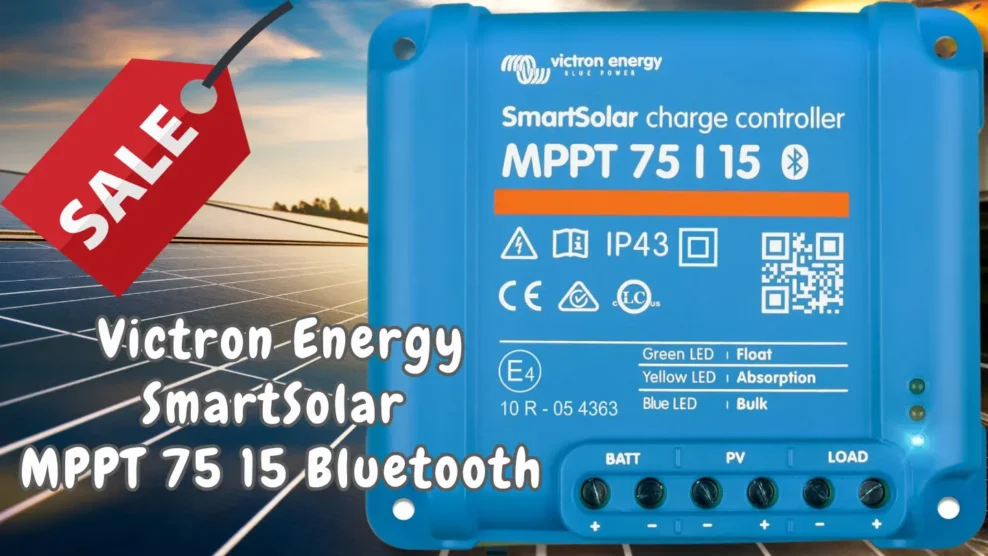
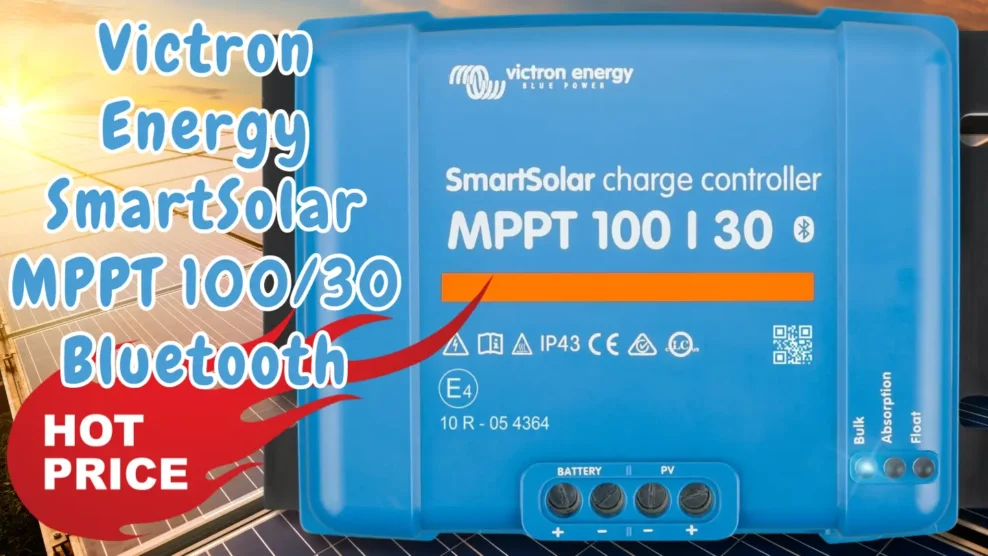
Victron Energy BlueSolar MPPT 100V 30 Amp Solar Charge Controller
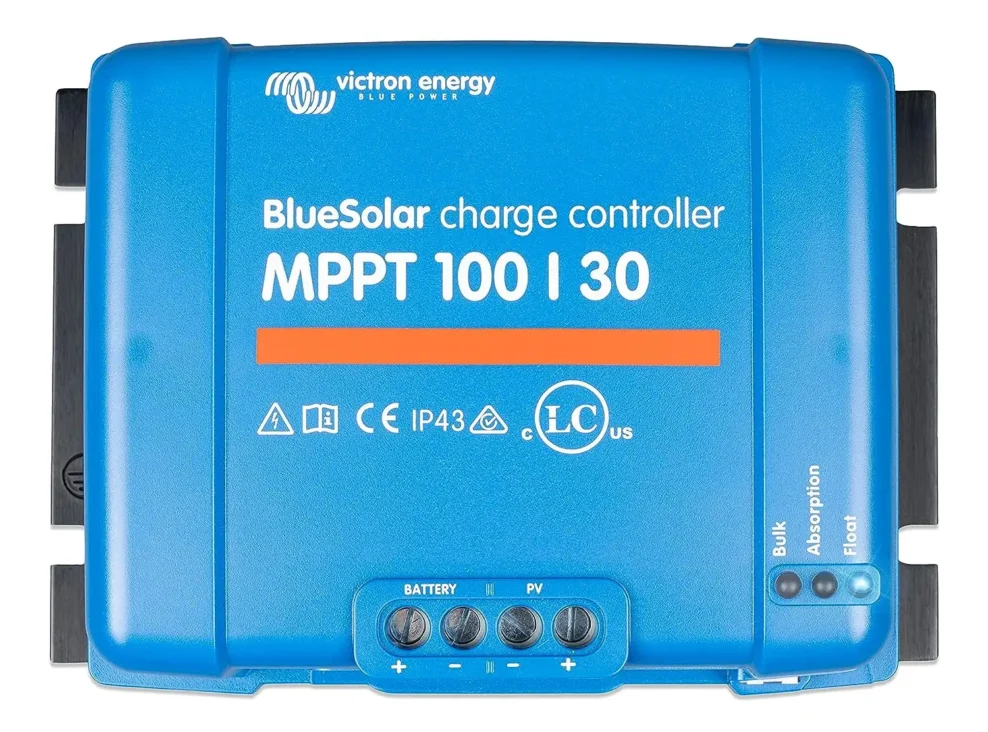
Now let’s talk about the solar system on the roof that we still need to install on our motorhome! In principle, this system could be used to charge the batteries via the alternator or shore power. However, that wouldn’t really be self-sufficient. To efficiently harness the energy from the solar panels into the batteries, we need the Victron Energy BlueSolar MPPT 100V 30 Amp 12/24-Volt Solar Charge Controller, which will be integrated into our system and later connected to the solar panels.
The Victron Energy BlueSolar MPPT 100V 30 Amp 12/24-Volt Solar Charge Controller is a Maximum Power Point Tracking (MPPT) charge controller that maximizes the power output of the solar modules. It is designed to operate with 12- or 24-volt batteries and can handle a maximum PV power of 440 watts at 12 volts or 880 watts at 24 volts.
This BlueSolar MPPT 100V 30 Amp 12/24-Volt Solar Charge Controller offers a range of features that make it an excellent choice for various types of solar systems, including:
- MPPT Technology: The charge controller’s MPPT algorithm maximizes the power output of the solar modules by always keeping the modules’ operating point optimal. As a result, the charge controller can harvest up to 30% more energy from the solar panels than a conventional charge controller.
- Ultra-Fast MPPT: The charge controller uses an ultra-fast MPPT algorithm that checks and adjusts the operating point of the solar modules every 100 milliseconds. This allows the charge controller to maximize the power output of the solar panels even in rapidly changing light conditions.
- Wide Input Voltage Range: The charge controller accepts input voltages from 10 to 100 volts, making it suitable for a variety of solar systems, including systems with solar panels in series and parallel.
- Multiple Outputs: The charge controller has two independent outputs that can be used simultaneously. This allows you to use the charge controller either to charge two batteries or to charge one battery and power 12-volt loads.
- Protection Features: The charge controller is equipped with a range of protection features, including short-circuit protection, overload protection, and overvoltage protection.
The Victron Energy BlueSolar MPPT 100V 30 Amp 12/24-Volt Solar Charge Controller is an excellent choice for various types of solar systems, including:
- Small off-grid systems
- Solar systems for motorhomes and boats
- Solar systems for garden sheds and vacation homes
- Solar systems for emergency power supply
If you’re looking for a reliable and efficient solar charge controller for your solar system, the Victron Energy BlueSolar MPPT 100V 30 Amp 12/24-Volt Solar Charge Controller is a top-notch option.
Price-wise, this is around 190 euros!
Solar Panel Main Switch
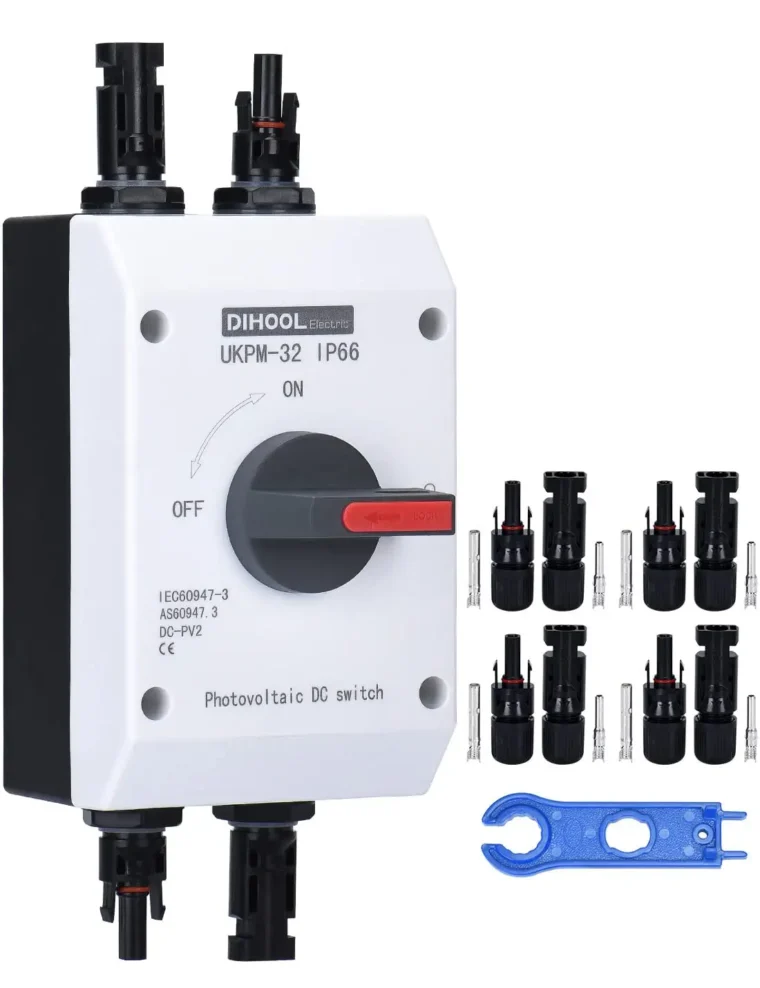
There are several crucial reasons why a main switch for the solar system in your motorhome is essential:
- Safety: The main switch allows you to completely shut off the solar system when necessary. This can be critical in emergencies such as fires or other dangerous situations to prevent electrical shocks.
- Maintenance: With the main switch, you can safely perform maintenance on the solar system without worrying about electrical shocks. For example, you can clean the solar panels or check the wiring by simply turning off the main switch and interrupting the power supply.
- Battery Charge Optimization: When the solar system is not actively being used, the main switch provides the option to turn it off to preserve the batteries. This prevents potential overcharging of the batteries, which could significantly affect their lifespan.
Safety:
The main switch acts as an essential safety device that can protect not only you but also your family from dangerous electrical shocks. In the event of a short circuit or other electrical malfunction, the main switch can interrupt the power supply to the solar system, thus minimizing the risk of electrical shock.
Maintenance:
The main switch provides you with the ability to safely maintain the solar system without worrying about electrical shocks. For example, if you want to clean the solar panels or check the wiring, you can simply turn off the main switch to interrupt the power supply and safely perform your maintenance work.
Battery Charge Optimization:
When you’re not using the solar system, the main switch allows you to turn it off, thereby preserving the batteries. This prevents potential overcharging of the batteries, which in turn extends their lifespan and improves energy efficiency.
What to Consider When Buying a Main Switch:
When purchasing a main switch, there are several crucial aspects to consider:
- Rated Current: The rated current of the main switch should be at least as high as the maximum current your solar system can deliver.
- Voltage: The main switch should be suitable for the voltage of your solar system.
- Contacts: The main switch should have high-quality contacts designed for continuous operation.
Conclusion:
A main switch for the solar system is an indispensable component that should be present in every motorhome. It not only ensures safety but also facilitates maintenance and optimizes battery charging, ultimately contributing to efficient and reliable power supply in your motorhome.
Solar system includes the solar panels
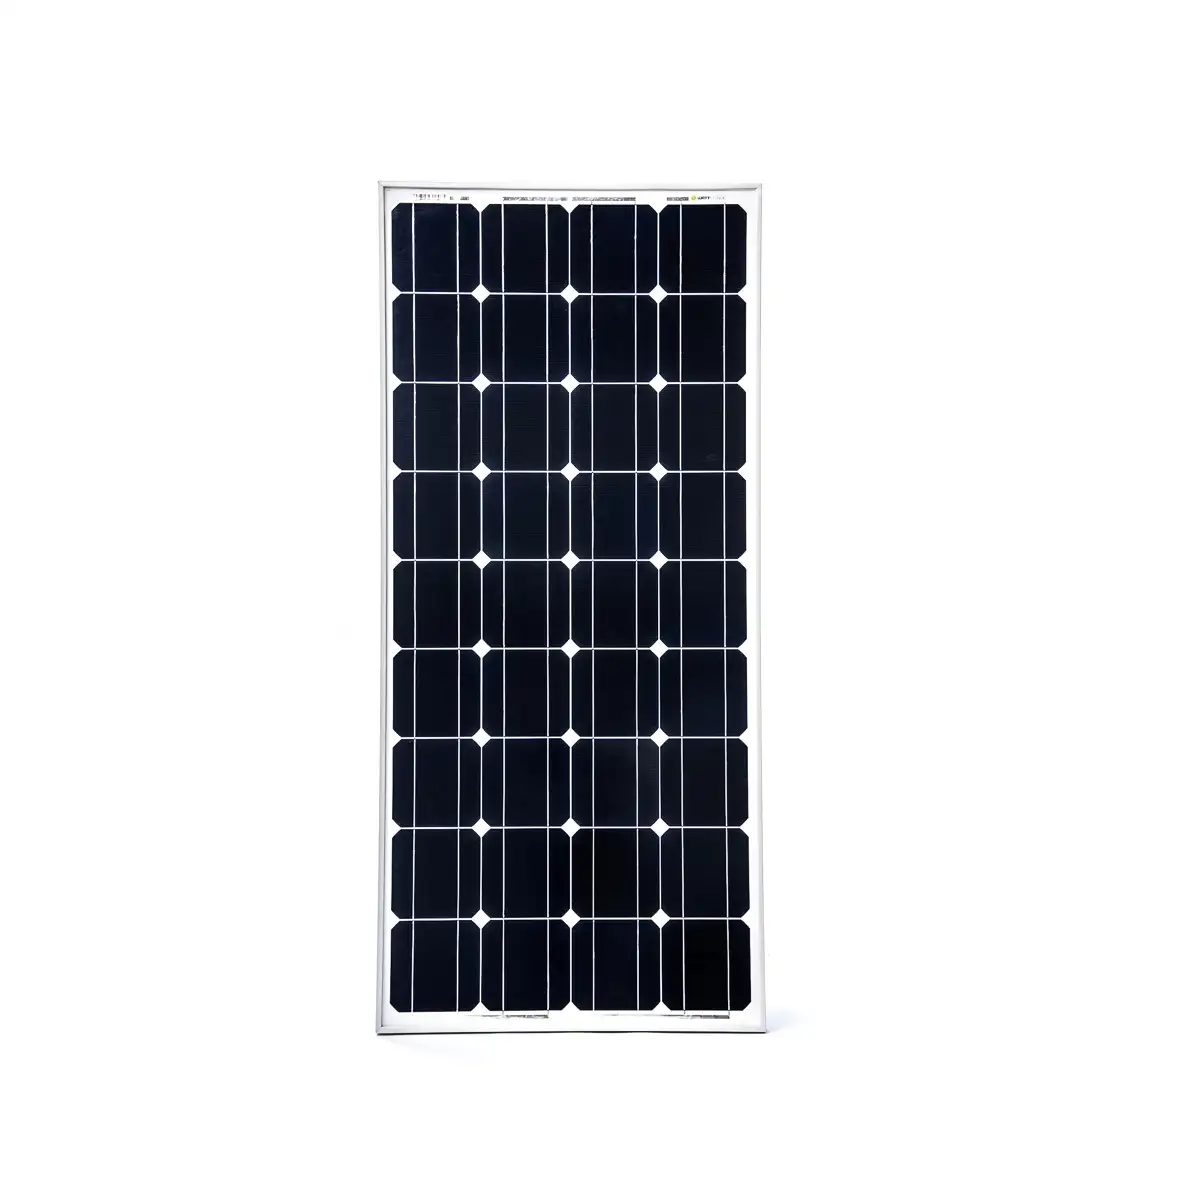
Choosing the right solar panels for your RV solar system is a crucial step and requires careful research beforehand. There are various types of solar panels, and it is advisable to research in advance which type best suits your individual requirements. Additionally, the decision between series connection and parallel connection is of great importance. I have written a detailed article on this topic that you are welcome to read.
For my off-grid power supply over several days or weeks, I have opted for four WATTSTUNDE® WS100M-A solar panels, each with a capacity of 100 watts. To ensure that my solar system operates efficiently, I am using the Victron Energy BlueSolar MPPT 100V 30 Amp solar charge controller, capable of handling up to 480 watts and 100 volts.
Since I am connecting the solar panels in series, there may be situations where the voltage exceeds 100 volts, even if I am only feeding in 200 watts with two solar panels. For this reason, I would install two Victron Energy BlueSolar MPPT charge controllers, with two of the total four modules connected to each controller. Although I could achieve the same output with just two or even one module, I want to ensure that the other solar panels can continue to deliver power in case of shading or other influences. Therefore, I would mount the four modules in different locations on the roof of the RV.
Overall, this gives me a maximum solar charging power of 400 watts peak (Wp), which is used to charge my 400 Ah lithium batteries in the RV. However, it is important to note that the theoretical possibility of fully charging the batteries with 400 Ah in 12 hours at full power is unrealistic in practice and will never occur. In reality, you can expect a charging power of about 20-30 percent of the rated power, depending on various factors such as temperatures on the solar panels and weather conditions, including clouds or shading from trees, etc.
The basic formula for calculating the charging time (in hours) for your batteries is based on the capacity of the batteries (in Ah) and the charging current (in A):
- Charging time (hours) = Battery capacity (Ah) / Charging current (A)
- Determine the capacity of your batteries (in Ah). Assuming you have batteries with a capacity of 400 Ah.
- Determine the charging current (in A) generated by your solar system. To do this, you need the power of the solar system (in watts) and the voltage of the batteries (in volts).
- To calculate the charging current, divide the power of the solar system (in watts) by the voltage of the batteries (in volts). For example, if your solar system generates 400 watts at 12 volts:
- Charging current (A) = Solar system power (watts) / Battery voltage (volts)
- Charging current (A) = 400 watts / 12 volts = 33.33 A
- Now you can calculate the charging time by dividing the capacity of the batteries (400 Ah) by the calculated charging current (33.33 A).
- Charging time (hours) = Battery capacity (Ah) / Charging current (A)
- Charging time (hours) = 400 Ah / 33.33 A ≈ 12 hours
This means that it would take approximately 12 hours to fully charge your 400 Ah lithium batteries with a solar system that consistently generates 400 watts.
- Battery capacity (Ah): 400, Charging current at 100% efficiency (A): 33.33
| Charging time (%) | Charging current (A) | Charging duration (hours) |
|---|---|---|
| 100 | 33.33 | approx. 12 |
| 90 | 29.99 | approx. 13.34 |
| 80 | 26.66 | approx. 14.99 |
| 70 | 23.32 | approx. 16.65 |
| 60 | 19.99 | approx. 18.30 |
| 50 | 16.66 | approx. 20.00 |
| 40 | 13.32 | approx. 21.66 |
| 30 | 9.99 | approx. 23.31 |
| 20 | 6.66 | approx. 24.96 |
| 10 | 3.32 | approx. 26.62 |
For your RV solar system, I recommend the high-quality monocrystalline 100 Watt solar modules from WATTSTUNDE®. These modules are ideal for powering your RV’s energy supply autonomously and offer the following advantages:
- With 100 watts of power and monocrystalline cells, they deliver efficient electricity.
- The high cell efficiency of 18.8% ensures optimal energy output.
- The module is equipped with anti-reflective glass and an IP65 junction box, making it robust and weatherproof.
- The integrated bypass diodes and pre-wiring with 90 cm solar cable and MC4 connectors simplify installation.
- You receive a 25-year performance guarantee.
- The module is enclosed in a sturdy hollow chamber profile frame, ensuring stability, especially under extreme conditions.
- The dimensions of the module are 1030 x 510 x 35 mm, and it weighs 5.6 kg.
The WATTSTUNDE® WS-M series solar modules are specifically designed for use in RVs and provide a reliable power source for autonomous battery systems. To optimize the solar system, you will need a charge controller from Victron Energy, which controls the power supply and protects your batteries from overcharging or deep discharge. Victron Energy offers a range of charge controllers that perfectly complement the WATTSTUNDE® solar modules. This one is already installed!
In addition to the modules and the charge controller, Victron Energy also provides other components and accessories for your autonomous energy supply in the RV. With this combination of high-quality solar modules and reliable products from Victron Energy, you can ensure that your RV’s energy supply operates reliably and efficiently, whether you’re at the campground, on the boat, or traveling on the road.
Summary of Solar System Costs!
| Component | Unit Price (in Euro) | Quantity | Total Price (in Euro) |
|---|---|---|---|
| WATTSTUNDE® Lithium 12V 200Ah Battery | 700 | 2 | 1400 |
| Battery Main Switch | 30 | 1 | 30 |
| Victron Lynx Distributor | 220 | 1 | 220 |
| Victron Energy BMV-712 Smart Battery Monitor | 160 | 1 | 160 |
| Victron MultiPlus-II 12/3000/120-32 | 1100 | 1 | 1100 |
| Victron VE.Bus Smart Dongle | 90 | 1 | 90 |
| 230 Volt Fuse Box | 25 | 1 | 25 |
| CEE Caravan Inlet Plug (Shore Power) | 20 | 1 | 20 |
| 12 Volt Fuse Box | 18 | 1 | 18 |
| Victron Energy BlueSolar MPPT 100V 30 Amp | 190 | 1 | 190 |
| Solar System Main Switch | 45 | 1 | 45 |
| WATTSTUNDE® WS100M-A Solar Module | 94 | 4 | 376 |
| Total | 3694 |
Cable costs
Finally, we must not forget the costs for cables, as they are an important part of the project. Cables can not only be expensive, but they also require a large cross-section and often a considerable length. In addition, there are costs for connectors, which are also significant. Moreover, you will need the right tools to safely make the connections. Here is an overview of some of the additional things you will need:
- Cables with sufficient cross-section and length
- Connectors and fittings
- Crimping tool for connecting the connectors
- Insulating tape and heat shrink tubing for secure protection of the connections
These additional costs should be included in your budget planning for the RV solar system.
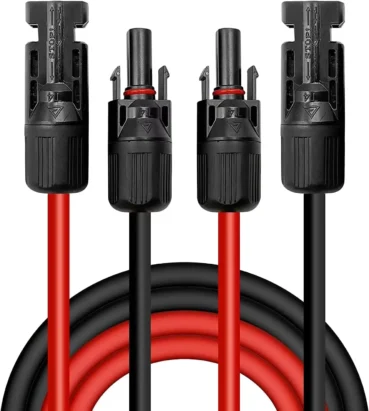
Solar cable 4mm²/6mm², Solar cable extension
These high-quality solar cables are made of oxygen-free, tinned copper wire and feature a robust insulation of cross-linked polyolefin. With a cross-section of 4mm², a nominal voltage of 1KVDC, and a current carrying capacity of 55A, they are ideal for solar systems. They are heat-resistant from -45°C to +125°C and can even withstand temperatures up to +250°C for short periods.
Thanks to the self-locking system, they are easy to install and remove. These solar cables are TUV, CE, CCC, SAA, and VDE certified and have a lifespan of 25 years. A reliable product for solar systems with excellent service. Price approximately 14 euros.

Solar Cable 6mm² Red/Black - 10m
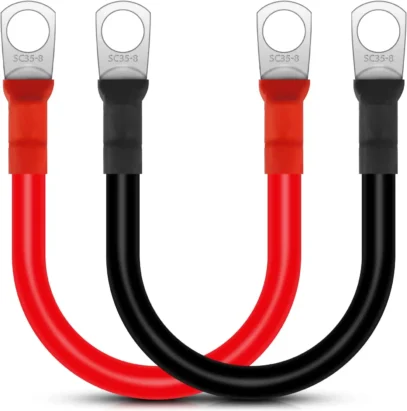
Battery cable parallel connection, 15cm 2 AWG 33.6mm²
High-quality materials: Our battery inverter cables are made of pure copper wire with nickel-plated copper terminals and PVC insulation. This ensures maximum energy transfer and excellent corrosion protection. Robust and secure cables: These 2AWG cables, with a length of 15cm, are designed for both positive (red) and negative (black) connections.
They are perfect for connecting batteries in parallel or in series. Tinned copper terminals: Tinning the copper terminals provides stability, wear resistance, and corrosion resistance. This enhances oxidation resistance and preserves conductivity. Price approximately 12 euros.
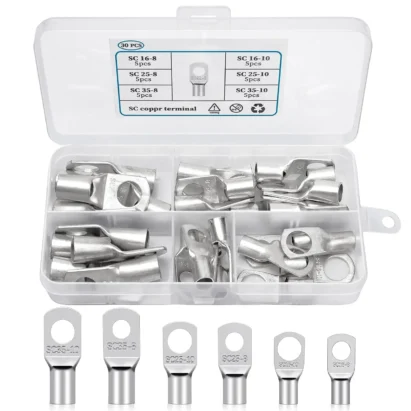
Tube cable lugs 16mm² - 35mm²
In our set, you’ll find 30 ring cable lugs in 6 different sizes, suitable for cables ranging from 16-35mm². The cable lugs are made of thickened tinned copper, ensuring excellent electrical conductivity, corrosion resistance, and oxidation resistance.
The thickened tube walls provide protection against vibrations and prevent conductor pull-out. You can easily attach them using a crimping tool or soldering iron, making them secure for various applications. Price is approximately 14 euros.

Battery Cable Lug Crimping Tool 6-50mm²
The battery cable lug crimping tool is ideal for heavy-duty stripping and crimping tasks. Made of hardened steel, it provides precise crimp shapes and secure locking for high-quality crimps. With various settings for cable sizes ranging from 6 mm² to 50 mm², it conforms to common AWG sizes.
The application is straightforward: remove cable insulation, select the appropriate tool setting, and create a perfect connection. This durable tool is versatile and suitable for various applications. Price approximately 33 euros.
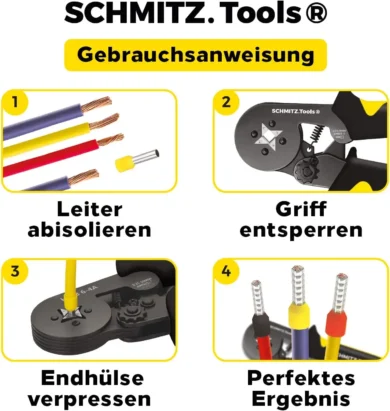
Crimping tool set 0.25–10mm2
Our crimping tool allows you to work precisely with cable end sleeves and connectors. It is versatile and can crimp cable end sleeves from 0.25 mm² to 10 mm², ensuring a strong connection. With its ergonomic handle, it is comfortable to use. The set includes 1800 pre-sorted insulated cable end sleeves in a storage box and a German instruction manual. Price around 40 euros.

Heat Gun for Shrinking and Heat Shrink Tubing
The SEEKONE Mini Heat Gun offers two temperature settings, 500°C and 300°C, along with a built-in overheating protection for safe operation. Featuring a sturdy ABS plastic body and stainless steel air outlet, it ensures durability. Its compact size and hands-free design make it easy to carry and convenient to use. It’s excellent for DIY projects such as shrinking, soldering, removing air bubbles, candle making, electronics repair, and more. With our 100% satisfaction guarantee, we offer full refund or return and a lifetime warranty if any issues arise. We’re available anytime to assist. Price is around 20 euros.

Isopropanol: Cleaning Electronic Components
Isopropyl alcohol, also known as isopropanol or 2-propanol, is a colorless, flammable, and strongly odorous alcohol that evaporates quickly and leaves no residue. It mixes well with water and has diverse applications, ranging from cleaning electronic components to maintaining lenses and screens. It is also suitable for 3D printing resins, paints, varnishes, and waxes, as well as for pharmaceutical and cosmetic purposes. With a purity of over 99.9%, it is laboratory certified. The convenient, drip-proof cap facilitates dosing in the 1-liter format. Price is approximately 9 euros.
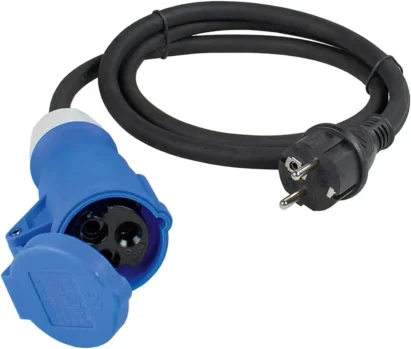
CEE adapter cable Caravan - 230 V / 16 A
Our CEE adapters provide you with instant access to the appropriate adapter for standard protective contact sockets. They are made of high-quality materials and feature a 1.5-meter heavy-duty rubber hose line H07RN-F 3G2.5, ensuring sufficient reach. With IP44 protection rating, they are also suitable for outdoor use.
Our products comply with current safety standards and have protective covers to ensure their longevity (Note: the adapters are not reverse polarity protected). They are ideal for caravans and motorhomes and can also be used on boats.
Our brand, as – Schwabe, has been synonymous with quality, precision, and innovation in electrical engineering for over 35 years. Price approximately 16 Euros.

High-current fuses
The package includes a total of 14 Midi fuses, comprising 2 pieces of each ampere rating: 30 Amp, 40 Amp, 50 Amp, 60 Amp, 70 Amp, 80 Amp, and 100 Amp. These fuses are designed for a rated voltage of 32 volts DC. Each ampere rating is easily identifiable through specific color coding.
The Midi fuses are constructed with plastic insulators and tinned zinc terminals. They are resistant to high temperatures and provide melting resistance to prevent sparking when the fuse blows.
These fuses are utilized in various high-current applications, including marine power systems, electric hybrid vehicles, inverters, automobiles, DC motors, car radios, and other applications. Price approximately 10 euros.
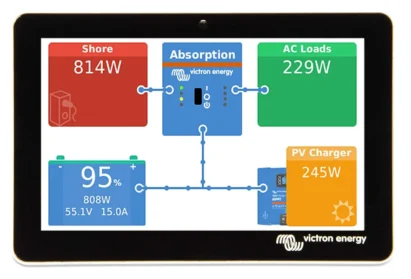
Victron Energy GX Touch 50, display screen / monitor
The Victron Energy GX Touch 50 is your sleek, waterproof display accessory, available separately for the Cerbo GX. The five-inch touchscreen display provides you with a quick overview of your system and allows for easy adjustment of settings.
Installation is a breeze, as you simply screw the screen onto your dashboard and connect it via a single cable, minimizing cable clutter. The GX Touch 50 perfectly complements your Cerbo GX, providing you with full control over your system anytime, anywhere, to maximize its performance.
With its slim, waterproof design, top-mounted installation, and easy setup, you can keep your dashboard neat and clean. Price approximately 220 euros.
Conclusion
Keep in mind that you will need additional cables, such as those from the starter battery to various electronic components. Additionally, cables for the entire 12-volt wiring with different cross-sections will be necessary. A socket wrench set, torque wrench, wire cutters, and screwdriver are also essential, but you probably already have these tools on hand.
If you’re building your own solar system, you could quickly reach 4000 euros or more, depending on where you shop. With Amazon Prime, many shipping costs are waived for me. I already have most of the necessary tools, and I’ve also acquired wood for mounting and other materials.
I think this project is fantastic, and by building your solar system, you’ll always have a clear understanding if something isn’t working. In my opinion, the best thing about Victron is that you can expand it at any time, and everything fits together seamlessly. You can monitor and adjust everything through the app or monitor. I hope my article provided insight into setting up a solar system for RVs or campers and better informed you.
Please note that there are various ways to install a solar system. How would you approach it or what steps might you take differently? Feel free to share your opinions and tips in the comments. I’m looking forward to hearing your views!
FAQ (Frequently Asked Questions) for Solar Systems with Victron Components in RVs
Independence from External Power Sources: Imagine being able to take your motorhome anywhere without worrying about finding power outlets or shore power connections. The solar system with Victron components provides you with power no matter where you’re traveling.
Environmentally Friendly Travel: Your motorhome becomes an environmentally friendly oasis. By using solar energy as the main power source, you significantly reduce your carbon footprint. This is not only good for you but also for the environment.
Long-term Cost Savings: The initial investment in a Victron solar system may be high, but in the long run, you’ll save money. You won’t need to buy expensive fuels for generators or pay for shore power. Your travel budget will thank you.
Freedom to Stay Longer: With a properly sized solar system and the right batteries, you can spend more time in the wilderness without worrying about recharging. Your travel adventures are extended, and you can enjoy the beauty of nature undisturbed.
Quiet and Low Maintenance: Forget about noisy generators and complicated maintenance. Solar systems with Victron components are quiet, reliable, and require minimal maintenance. You can enjoy your journey in peace.
Flexibility and Expandability: These solar systems are like building blocks for adults. If you need more power, you can simply add additional solar panels or batteries. Your power source grows with your needs.
Intelligent Performance Monitoring and Control: Victron offers advanced monitoring systems that allow you to track the performance of your solar system and control the charging process. You have control over your own power source.
Reduced Fuel Consumption: By using solar power to operate electrical devices instead of fossil fuels, you not only save money but also reduce CO2 emissions. Your motorhome becomes more environmentally friendly.
Contributions to Environmental Protection: By relying on solar energy, you’re helping to protect the environment. Less noise, fewer emissions, and more sustainability make you a green camper.
Increased Value of Your Motorhome: A motorhome with a high-quality solar system and Victron components can increase the value of your vehicle. This is not only interesting for yourself but also for potential buyers.
In summary, a solar system with Victron components makes your motorhome travels more convenient, environmentally friendly, and cost-effective. You enjoy the freedom of the road without sacrificing comfort and sustainability.
To install a solar system in your motorhome using Victron components, you’ll need a range of components that together form an efficient and reliable system. Here are the essential Victron components you’ll need:
Solar Panels: These are the photovoltaic panels that convert sunlight into electrical energy. The number and size of the panels depend on your energy needs.
Solar Charge Controller (MPPT): The solar charge controller, ideally a Victron MPPT (Maximum Power Point Tracking), regulates the battery charging process. It optimizes the energy output of the solar panels and protects the batteries from overcharging.
Batteries: You’ll need suitable batteries to store excess energy for use when needed. Victron offers various battery models, including gel and lithium batteries.
Inverter: An inverter, such as the Victron MultiPlus, converts the stored direct current (DC) into alternating current (AC) needed for electrical devices and household appliances in your motorhome.
Battery Monitor: A Victron battery monitor allows you to monitor the battery status, charging and discharging performance, and other important parameters. This helps in properly maintaining the batteries and protecting them from deep discharge.
Monitoring and Control Device: Victron offers devices like the Color Control GX or the VictronConnect app, which allow you to monitor and control the performance of your solar system. These devices also offer remote monitoring and control capabilities.
Safety Components: Safety components such as fuses, disconnect switches, and surge protectors should be integrated into your system to ensure safety and protection against electrical issues.
Wiring and Connectors: You’ll need appropriate cables, connectors, and mounting materials to connect all components together and install them securely.
Mounting Structure: The solar panels need to be mounted on the roof or another suitable location. For this, brackets and mounting frames are required.
Tools and Accessories: You’ll also need tools such as drills, screws, cable ties, and insulation materials to perform the installation.
It’s important to note that the exact requirements may vary depending on the specific circumstances of your motorhome and your energy needs. Careful planning and professional installation are crucial to ensure an efficient and safe solar system.
Sizing a solar system for your motorhome requires careful planning, taking into account your specific energy needs and the available space on the motorhome. Here are the steps to sizing a solar system:
- Determine Energy Needs:
Start by determining the daily energy consumption of your motorhome. Make a list of the electrical devices and appliances you plan to use and estimate their power consumption in watts (W) per hour. Multiply this by the expected usage time to calculate the daily energy consumption in watt-hours (Wh).
- Consider Sunlight Exposure:
The amount of solar energy you’ll receive per day depends on your location and the season. Research the average daily sunlight exposure in your travel area. You can use regional solar maps and databases to find this information.
- Choose Solar Panel Capacity:
You can calculate the required solar panel capacity by dividing the daily energy consumption (in Wh) by the average daily sunlight exposure (in hours). This will give you the required solar panel capacity in watts (W). Note that motorhomes often have limited space for solar panels, so choose panels that fit within your available space.
- Determine Battery Capacity:
The battery capacity should be sufficient to store the generated solar power for nighttime use or cloudy days. Also, consider the depth of discharge (DoD) of the batteries to extend their lifespan. The deeper you discharge the batteries, the greater the capacity should be.
- Select Solar Charge Controller:
Choose a solar charge controller that matches the solar panels and batteries. Ensure it provides the appropriate rated charging current (in amperes, A) for your system and ideally is an MPPT (Maximum Power Point Tracking) controller to increase energy harvesting efficiency.
- Choose an Inverter (if necessary):
If you want to operate AC appliances in your motorhome, you’ll need an inverter. Choose an inverter with sufficient power (in watts) to operate your devices.
- Safety and Mounting Components:
Remember to integrate safety components such as fuses, disconnect switches, and surge protectors into your system. Ensure you securely mount the solar panels on your motorhome.
- Seek Professional Advice:
It’s advisable to seek professional advice from solar experts or technicians to ensure your solar system is optimally sized and safely installed.
- Flexibility and Expandability:
Plan your solar system so that it can be expanded if needed. This allows you to adapt the system to changing requirements.
The exact sizing of your solar system depends on your individual needs, travel habits, and the spatial limitations of your motorhome. Careful planning ensures that your solar system operates optimally and meets your energy needs on the road.
Installing a Victron solar system in your motorhome requires some technical skills and careful planning. Here’s a step-by-step guide to installation:
1. Planning:
- Start with detailed planning. Consider the space required for the solar panels, the location of the solar charge controller, batteries, and inverter. Ensure all components are securely and well-ventilated.
2. Mounting the Solar Panels:
- Mount the solar panels on the roof or another suitable location. Ensure the panels are securely fastened and the wiring is properly routed. Use waterproof seals to prevent leaks.
3. Wiring the Solar Panels:
- Connect the solar panels together and run the cable to the solar charge controller. Ensure the wiring is correctly sized and connected to the charge controller as per the manufacturer’s instructions.
4. Installing the Solar Charge Controller:
- Mount the solar charge controller in a well-ventilated location inside the motorhome. Connect the solar panels and batteries according to the manufacturer’s instructions. Ensure the wiring is properly routed and securely fastened.
5. Battery Installation:
- Install the batteries in a secure, well-ventilated location to dissipate any potential gases. Connect the batteries to the solar charge controller, ensuring correct polarity.
6. Installing the Inverter (if necessary):
- If using an inverter, mount it in a suitable location and connect it to the batteries. Ensure the inverter wiring is securely insulated.
7. Wiring and Safety:
- Lay the wiring carefully and securely to avoid shorts or damage. Use appropriate fuses and disconnect switches to protect the system from overload or malfunctions.
8. Battery Monitor and Monitoring:
- Install a Victron battery monitor to monitor the condition of your batteries and the performance of your solar system. Connect monitoring devices such as the Color Control GX if necessary.
9. Testing and Commissioning:
- Carefully check all connections and safety precautions. Start up the solar system and monitor it to ensure it’s functioning correctly.
10. Documentation and Maintenance:
- Document the installation carefully and create a list of necessary maintenance tasks. Regular maintenance, including cleaning the solar panels and checking connections, is important to ensure the efficiency and lifespan of your solar system.
11. Professional Assistance:
- If you’re unsure about the installation, it’s advisable to seek professional assistance from an electrician or solar technician to ensure the installation meets applicable safety standards.
Installing a solar system requires careful planning and technical knowledge. If you’re unsure, it’s always wise to seek professional assistance to ensure your system operates properly and safely.
Proper maintenance of your Victron solar system is crucial to ensure its efficiency and longevity. Here are some important maintenance and care tips:
1. Cleaning the Solar Panels:
- The solar panels should be cleaned regularly to remove dirt, dust, and debris. Use a soft sponge or cloth, mild soapy water, and clean water to remove residues. Avoid using sharp or abrasive materials that could damage the panels.
2. Checking the Wiring:
- Inspect the wiring for signs of abrasion, damage, or loose connections. Correct any identified issues immediately. Ensure the cables are properly insulated to prevent shorts.
3. Monitoring the Solar Charge Controller:
- Check the solar charge controller for signs of overheating or unusual behavior. Ensure no foreign objects are stuck in the controller’s cooling vents that could impair ventilation.
4. Battery Monitoring:
- Utilize the Victron battery monitor to monitor the condition of your batteries. Watch for signs of deep discharge or overcharging. Ensure the batteries are always adequately charged to extend their lifespan.
5. Fuses and Protection Devices:
- Regularly check the fuses, disconnect switches, and surge protection devices in your system. Replace damaged fuses and ensure the protection devices are functioning properly.
6. Firmware Updates:
- Keep the firmware and software of your Victron components up to date by regularly checking for and installing updates. Updated firmware can improve performance and reliability.
7. Careful Storage of Spare Parts:
- If you keep spare parts or components for your solar system, store them in a cool, dry place to extend their lifespan.
8. Regular Inspection:
- Conduct regular inspections of your entire solar system to detect and address potential issues early. Follow the manufacturer’s maintenance instructions.
9. Professional Assistance:
- If you encounter problems you cannot resolve yourself or if you are unsure, consult a professional or technician with experience in solar systems.
Maintaining your Victron solar system is important to ensure maximum performance and lifespan. A well-maintained system will reliably provide you with clean energy on your travels and prevent unpleasant surprises.
Yes, you can monitor the energy generation and battery status of your Victron solar system using Victron components and monitoring systems. Victron offers advanced monitoring and control options that allow you to efficiently manage your solar system. Here are some methods for monitoring:
1. Victron Battery Monitor:
- A Victron battery monitor is an essential tool for monitoring battery status. This device displays information such as state of charge, discharge rate, and battery voltage. You can also program alarms and shutdown thresholds to protect the battery from deep discharge.
2. Victron Color Control GX:
- The Victron Color Control GX is a powerful monitoring and control system. With this touchscreen display, you can view and control the status of your entire energy solution, including solar panels, batteries, and inverters. You can also view performance history and detailed diagnostic information.
3. VictronConnect App:
- The VictronConnect app enables wireless monitoring of your Victron components via mobile devices. You can monitor battery status, energy generation, and consumption in real-time. The app also provides the ability to remotely control and configure your system.
4. Online Monitoring and Cloud Service:
- Victron also offers a cloud service that allows you to monitor your solar system online. You can access real-time data and historical performance data to track the performance of your system over time.
5. Data Logger and Bluetooth Connectivity:
- Some Victron components have built-in data loggers and Bluetooth connectivity. You can connect them to a Bluetooth-enabled device to retrieve real-time data and diagnostic information.
By monitoring energy generation and battery status, you can maximize the efficiency of your solar system and ensure that your batteries are optimally charged. This allows for better control over your energy supply and helps to detect and address issues early. The availability of monitoring options depends on the specific Victron components you use in your system.
Protecting your batteries from deep discharge is crucial to extending their lifespan and maintaining their performance. Here are some important measures you can take to safeguard your batteries from deep discharge:
1. Use a Battery Monitor: Install a battery monitor, preferably from Victron or a similar manufacturer, to monitor the state of your batteries. A battery monitor displays the current state of charge, discharge rate, and other critical information. This allows you to closely monitor the battery status and avoid over-discharge.
2. Set Shutdown Limits: Program the battery monitor to set shutdown limits. This means that the batteries will automatically shut off once a certain discharge level is reached. This value should be chosen to prevent the batteries from being overly discharged and still have enough capacity for safe operation.
3. Monitor Energy Consumption: Pay attention to how much energy your consumers draw from the batteries. Monitor consumption and turn off unnecessary devices when the battery level is low. Make sure you’re not drawing more energy than the batteries can handle.
4. Use Batteries with Adequate Capacity: Ensure that the capacity of your batteries is sufficient to meet your energy needs. If you frequently operate with low battery charge, you may need to invest in batteries with higher capacity.
5. Use a Solar Charge Controller with Adjustability: A high-quality solar charge controller, preferably from Victron, allows you to adjust the settings for charging. You can set the shutdown voltage to optimize battery protection.
6. Perform Regular Maintenance: Regularly check the condition of your batteries and perform maintenance according to the manufacturer’s recommendations. This may include checking the water level in flooded batteries or inspecting the condition of AGM or gel batteries.
7. Consider Temperature: Temperature can affect battery performance. Ensure that your batteries are stored in a well-ventilated area protected from extreme temperatures.
8. Use Automatic Disconnect Switches: Automatic disconnect switches can cut the connection between the batteries and the consumers when the battery level reaches a critical point. This protects the batteries from deep discharge even when you’re not nearby.
Deep discharge can significantly shorten the lifespan of batteries and damage them. By carefully monitoring and protecting your batteries, you can ensure they operate optimally and reliably supply power when needed.
A Victron solar system can power many of the devices in your RV, but there are some important considerations to keep in mind:
Power Requirements: You need to ensure that the power output of the solar system and the capacity of the batteries are sufficient to operate the connected devices. Check the power consumption (in watts) of each device and ensure that the solar system and batteries can provide this power. Note that certain devices, especially high-power ones like air conditioners or electric heaters, may require a significant amount of electricity and may not be efficiently operated using solar power.
AC Devices: Most RVs use alternating current (AC) for powering most devices. Your Victron solar system typically generates direct current (DC). Therefore, you will need an inverter to convert DC to AC if you want to operate AC devices. Ensure that the inverter is adequately sized to provide the required power.
Battery Capacity: The capacity of your batteries is crucial for how long you can operate devices when there is no sunlight. A larger battery capacity allows for longer operating times without recharging.
Energy Demand and Consumption: You should consider your daily energy demand and the consumption of your devices. A battery monitor can help you monitor power consumption and ensure that you do not draw too much power.
Prioritization: You may need to prioritize if there is not enough power to operate all devices simultaneously. Critical devices such as refrigerator, lighting, and water pump should take precedence.
Season and Location: The amount of sunlight and the season can affect the performance of your solar system. During winter months or in bad weather, power generation may be reduced.
Overall, it is possible to power many devices in your RV with a Victron solar system, but planning and sizing the system are crucial. It is important to carefully match the output of your solar system, the capacity of your batteries, and your actual energy needs to ensure that your requirements are met and your system operates efficiently. It is also advisable to seek professional advice to ensure that your solar setup performs optimally.
The time it takes for a Victron solar system to pay for itself depends on various factors and can vary significantly. Here are some key considerations:
1. Initial Investment: The payback period heavily depends on the initial investment costs. A larger and more powerful solar system typically takes longer to pay off, while a smaller and more affordable system may achieve a return on investment more quickly.
2. Energy Demand: Your daily energy demand and the amount of power the solar system can generate influence the payback period. The higher your energy needs and the more devices you operate, the longer it may take for the system to pay for itself.
3. Electricity Costs: The price you typically pay for electricity is a crucial factor. The higher the electricity costs in your area, the faster you can recoup the costs of the solar system through saved electricity bills.
4. Location and Sunlight: The location of your mobile home affects the amount of sunlight the solar system can capture. If you frequently travel to sunny locations, the payback period will be faster compared to places with less sunlight.
5. Energy Efficiency: The efficiency of your solar system in generating energy and your batteries in storing energy also affects the payback period. High-quality solar systems and batteries, such as those from Victron, are often more efficient and can accelerate payback.
6. Subsidies and Tax Benefits: Some regions and countries offer subsidies, tax benefits, or incentive programs for installing solar systems. These can significantly shorten the payback period.
Therefore, the payback period can range from several years to a decade or more, depending on these factors. Careful planning, consideration of local conditions, and a realistic assessment of your energy needs are important to shorten the payback period. It’s also advisable to seek professional advice to get an accurate estimate of how long it will take for your specific solar system to pay for itself.
Yes, Victron offers warranties for its products to ensure the quality and reliability of the devices. The exact warranty terms may vary depending on the type of product and the region, but here are some general details about Victron’s warranty terms:
Standard Warranty: Most Victron products come with a standard warranty, typically lasting for 5 years from the date of purchase or from the date of commissioning, whichever occurs first. This warranty covers material and manufacturing defects.
Extended Warranty: For certain products, such as lithium batteries, Victron offers an extended warranty under specific conditions, which extends beyond the standard warranty period. The terms of this extended warranty may vary depending on the product.
Warranty Transfer: In some cases, the warranty can be transferred to the next owner if the product is resold.
Warranty Registration: To make warranty claims, it’s important to properly register the product within a certain period after purchase or commissioning. This registration process is typically done online on the official Victron website.
Warranty Exclusions: The warranty typically does not cover damages caused by improper handling, improper installation, or misuse. It also does not cover normal wear and tear or consumable parts.
It’s important to review the specific warranty terms for the Victron product you’ve purchased, as these may vary depending on the product type and region. This information is usually found in the product manual or on the official Victron website. If you encounter an issue with a Victron product covered by the warranty, I recommend reaching out to an authorized dealer or the Victron customer service team for assistance with processing the warranty claims.
Currently, there are three main types of solar modules:
- Monocrystalline Solar Modules: Monocrystalline solar modules are the most widely used type of solar module. They consist of individual silicon crystals pressed into a plate. Monocrystalline solar modules have the highest efficiency but are also the most expensive.
- Polycrystalline Solar Modules: Polycrystalline solar modules are made up of many small silicon crystals pressed into a plate. Polycrystalline solar modules are less efficient than monocrystalline solar modules but are also less expensive.
- Thin-Film Solar Modules: Thin-film solar modules consist of a thin layer of silicon or another light-absorbing material. Thin-film solar modules are the cheapest type of solar module but also have the lowest efficiency.
Additionally, there are several special types of solar modules suitable for specific applications. These include:
- Flexible Solar Modules: Flexible solar modules are made of thin, flexible material and can be installed on curved surfaces.
- Solar Modules with Trackers: Solar modules with trackers follow the sun throughout the day to maximize power output.
- Solar Modules with Integrated Energy Storage: Solar modules with integrated energy storage store the generated electricity for later use.
Which type of solar module is right for me?
Choosing the right type of solar module depends on several factors, including:
- Cost: Monocrystalline solar modules are the most expensive, followed by polycrystalline solar modules and thin-film solar modules.
- Efficiency: Monocrystalline solar modules have the highest efficiency, followed by polycrystalline solar modules and thin-film solar modules.
- Application: Flexible solar modules are suitable for applications requiring a lightweight and flexible module. Solar modules with trackers are suitable for applications where maximum power output is desired. Solar modules with integrated energy storage are suitable for applications where generated electricity needs to be used on-site.
Conclusion
When selecting solar modules, it’s important to consider your own needs and requirements. In most cases, monocrystalline solar modules are the best choice as they offer the highest efficiency. Polycrystalline solar modules are a good alternative if cost is a significant factor. Thin-film solar modules are a good choice for applications requiring a lightweight and flexible module.